Studying methods to use Microsoft Groups correctly can prevent heaps of time. It has a built-in whiteboard, video chat performance, staff group instruments, and integrates properly with the Microsoft 365 productiveness cloud and its suite of helpful functions.
With each instructional and enterprise interactions more and more shifting on-line, it’s extra essential than ever to successfully talk and set up with massive teams to attain widespread targets, impart information, and create a productive atmosphere for work and studying. Learn on to seek out out extra about methods to use Microsoft Groups.

What’s Microsoft Groups?
Created by Microsoft as a collaboration app, Groups combines the very best options from Microsoft Classroom and Skype for Enterprise to create a program able to file storage, app integration, videoconferencing, instantaneous messaging, VoIP calling, and granular group of staff and collaborators.
Groups has greater than 270 million customers all over the world and is the preferred collaboration app with companies. Nevertheless, it isn’t solely a enterprise app. Greater than 1 million individuals use Groups as their major messaging app as properly.
The app itself is full of performance. For starters, individuals can silo completely different components of their lives into unbiased Groups. For instance, an individual may have private chats and work chats unbiased of one another. These are the nuts and bolts of Microsoft Groups.
Every Crew has one-on-one chats (known as Chats), group chats (known as Groups Channels), file sharing, group whiteboards, and video calling with as much as 100 individuals. There’s additionally the flexibility to schedule occasions straight within the app so all people concerned receives it of their calendars, and customers can set reminders within the app.
Lastly, there’s the flexibility to customise profile footage for each people and whole teams, and customers can set their availability standing straight within the app so others know in the event that they’re round or not.

The right way to set up Microsoft Groups on PC
Microsoft Groups is free to make use of. Nevertheless, if you wish to unlock full performance with seamless syncing between OneDrive, Calendar, To Do, and different Microsoft apps, you may desire a Microsoft 365 account. For cellular units, merely head to the App Retailer, seek for “Microsoft Groups,” and set up the app.
Most fashionable Home windows PCs include Groups pre-installed. Nevertheless, in case your pc does not have it, the method is simple.
Step 1: Obtain Groups from Microsoft.
Step 2: Run the downloaded file and observe the on-screen directions to put in the applying.
Step 3: Sign up along with your Microsoft account when Groups opens.

The right way to arrange Groups for people
Groups is a unbelievable communication device for on a regular basis use. Not solely are you able to make video calls along with your family members, however you too can textual content them through SMS straight from Groups!
Setting it up is simple and will solely take a minute or two.
Step 1: In Home windows, open the Begin menu and choose Groups. On Mac, open the Launchpad and click on on Groups.
Step 2: Sign up along with your Microsoft account.

The right way to arrange Groups for organizations
Companies and organizations can arrange Groups simply as simply as people. The distinction is that the group might want to invite members to hitch its Crew. This course of is straightforward sufficient, however every individual on the staff might want to set up and arrange Groups on their finish.
Organizations will even want an lively Microsoft 365 Enterprise or Enterprise subscription to work, and so they’ll want a sound area title. One other factor to notice is the complete Enterprise or Enterprise variations of Groups are usually not out there for tutorial establishments.
As soon as all staff members have Groups put in, establishing Groups for everyone to make use of is straightforward. This is how:
Step 1: Open Groups from the Begin menu or Launchpad (on Mac).
Step 2: Choose Join Groups.

Step 3: Enter your group’s id and press Subsequent.
Step 4: Enter your particulars, then choose Arrange Groups.
Step 5: Invite your staff to hitch your group.
Microsoft will e mail you a hyperlink you should use to ask your staff members, or you possibly can click on on the Groups icon on the left-side menu and choose Invite individuals on the backside.

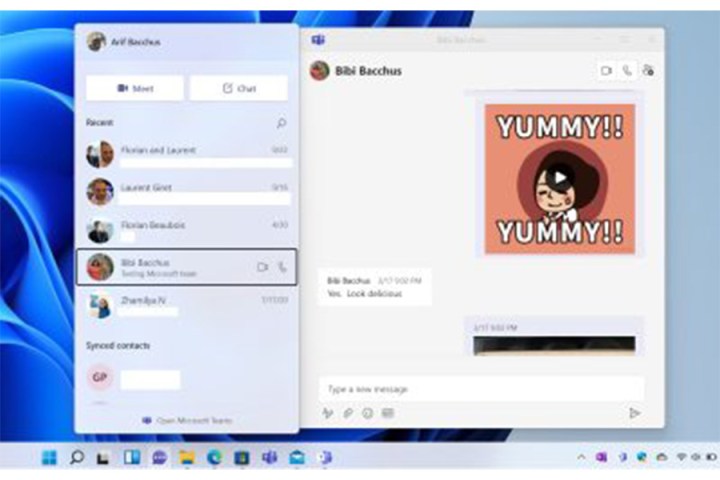
The right way to chat in Groups
Chatting is arguably Groups’ strongest swimsuit. Whether or not as a person person or as a part of a corporation, chats hold you related.
Microsoft Groups has the identical chatting capabilities you’ll anticipate finding in different chat apps akin to WhatsApp and iMessage. It is usually a powerful competitor to Slack relating to team-based chats. You may discover the app pretty easy to make use of.
Step 1: Choose Chat from the left-side menu bar.
Step 2: Choose New Chat from the little field with a pen above it. You may discover this within the Chat window to the proper of the menu bar.

Step 3: Kind the title of the individual or individuals with whom you want to chat within the “to” area.
Groups will routinely recommend individuals in your group or your contact record.
Step 4: Write your message within the Kind new message area.
You’ll be able to simply discover all of your chats within the Chat menu. Groups will hold them the second you start a brand new chat.
The right way to use Channels in Groups
Channels are sections of your Crew the place you possibly can hold the whole lot organized by topic, initiatives, and so on. Nevertheless, they’re known as Groups, not Channels. But relating to utilization, Microsoft calls them Channels, and the general group is the “Crew.” It is complicated, we all know.
Channels (or Groups) are massive group chats the place total groups of individuals (there it’s once more) can message one another, share information, be a part of video conferences, and extra. Admins can set roles inside the staff, akin to Crew Proprietor and Crew Member. They’ll additionally designate moderators to handle content material on the channel … err, staff.
Every staff routinely comes with a “common” channel, however should you’re working a enterprise, you may in all probability wish to break that down into extra centered silos. This is how.
Step 1: Click on on the Groups icon within the left-side menu bar.
Step 2: Click on Be part of or create a Crew on the backside of the display.

Step 3: Select whether or not to create a staff From scratch or From a Group or Crew so as to add any present group or staff contacts.
Step 4: Choose Personal, Public, or Org-wide in your Crew’s privateness degree, then enter a reputation and outline.
Step 5: Choose Create Crew to complete the method.
The right way to share information in Groups
One in all Microsoft Groups standout options is the flexibility to share information massive and small along with your total group. OneDrive and Sharepoint could be embedded proper into the applying, providing you with fast entry to your cloud information on each machine.
Step 1: From a chat window, choose the Connect icon resembling a paperclip and click on both OneDrive or Add from my pc. You can even copy and paste the sharing URL into the compose-message field.
Step 2: Sharing information is strictly the identical for channels, however the Connect choices additionally embody Latest and Browse Groups and Channels.
Step 3: After the file finishes attaching, choose Ship to share your file.

The right way to use a whiteboard in Groups
Whiteboard entry is without doubt one of the latest additions to Microsoft Groups, and it turns the platform right into a productiveness powerhouse for companies and organizations. You’ll be able to brainstorm, make diagrams, and doodle mindlessly whereas everybody watches.
The Whiteboard operate is just out there throughout a staff assembly. Nevertheless, admins will first have to allow the flexibility.
Step 1: (Admins solely) Go to the Microsoft Groups Admin Heart – opens in an internet web page.
Step 2: Click on Settings.
Step 3: Choose Providers and add-ins.
Step 4: Scroll right down to Whiteboard.
Step 5: Toggle Flip Whiteboard on or off for total group to “on.”
Step 6: Head to the Groups icon within the left-side menu bar of the Groups app.
Step 7: Discover the Crew (aka Channel) with whom you wish to share a whiteboard.
Step 8: Click on on the *Meet now * icon on the top-right nook of the Crew chat (it appears like a movie digital camera).
Step 9: Identify your assembly and press Be part of now.
Step 10: As soon as within the assembly, choose Share.
Step 11: Within the Whiteboard part, choose Microsoft Whiteboard.

The right way to schedule occasions in Groups
You’ll be able to simply schedule conferences and reside occasions in Groups. and each member might be notified. As soon as they settle for, the assembly or occasion will seem of their Microsoft 365 calendar. You are able to do this with recurring occasions as properly.
Step 1: Go to the Groups tab within the left-side menu bar.
Step 2: Select the staff with whom you wish to have a gathering.
Step 3: Click on on Schedule a gathering underneath the chat field.
Step 4: Choose Calendar on the left aspect of the assembly pop-up.
Step 5: Click on on New assembly.
Step 6: Choose the date and time for the assembly from the pop-up.
Step 7: Choose Save.
Step 8: Alternatively, you should use the Scheduling Assistant that can assist you discover the very best time for a gathering with all of the staff members.
Scheduling Assistant is what Microsoft has down with Cortana, their now-defunct digital assistant. Choose this selection, and the assistant will present you the free and busy occasions of your staff members.
The right way to make video calls in Groups
Groups means that you can make one-on-one video calls or conduct group video calls with as much as 100 contributors. Everybody can chat, share information, and work on a whiteboard throughout these calls.
Step 1: Out of your chat record, choose the New chat button.
Step 2: Enter the title or names of your contacts into the To area on the prime of the chat.
Step 3: Choose the Video name button resembling a digital camera to start out a name.

The right way to share your display in Groups
You’ll be able to share your display with staff members throughout a Groups video name. The method is simple. This is how.
Step 1: Whereas in a Groups assembly, click on Share within the middle of the display, then choose the window, doc, or display to share.
Step 2: When completed, click on Cease sharing within the backside proper.
Word {that a} crimson border seems round any content material that you’re actively sharing.

The right way to verify your messages and notifications on Groups
The Exercise feed serves as a one-stop store for viewing all messages, whether or not you joined or got management of a staff, replies to your posts in addition to posts you’ve got preferred, urged posts, and trending posts. You’ll obtain a notification in each the Chat menu and Exercise feed whenever you obtain a message, however different notifications could be discovered solely underneath Actions.
Any DMs despatched between people or teams will stay non-public, whereas sending a message in a channel will trigger a notification to look in your Exercise feed. Channel messages may also allow you to ship preview playing cards that element actions on the Groups app.
The right way to change your settings on Groups
Whereas Groups presents a plethora of choices together with language, keyboard shortcuts, and app settings, this is methods to arrange the three most necessary settings. Specifically, methods to change your profile image, configure your privateness settings, and select a theme.
Step 1: Choose your Account icon within the top-right nook.
Step 2: Click on Settings.

The right way to change your profile image on Groups
Step 1: From the Settings menu, choose Edit profile.
Step 2: Choose the Add image button to open a File Add window.
Step 3: Choose your new picture, and click on the Open button to add your picture.
Step 4: Choose Save.

The right way to change your privateness settings on Groups
Choose the Safety tab to regulate your safety settings, together with Do Not Disturb, precedence entry, call-blocking, learn receipts and survey participation.
Word that should you change the learn receipt settings, you’ll have to shut all chats for the settings to take maintain.

How to decide on a theme on Groups
Step 1: From the Groups app, choose your Account icon within the upper-right nook to open the principle menu and click on Settings.
Step 2: Choose the Basic tab and resolve between Default, Darkish, and Excessive Distinction.

The right way to ship an SMS with Groups
The beauty of Microsoft Groups is its capability to ship SMS messages to non-Groups customers. This operate is a perk to utilizing a private Groups account that companies haven’t got.
Step 1: Click on on the Chat tab in left-side menu.
Step 2: Choose New Chat.
Step 3: Enter your recipient’s telephone quantity within the To: area.
Step 4: Enter a reputation in your contact. They will not see the title you assign — that is solely in your use.
Step 5: Kind a message and ship it.
Groups is jam-packed with performance for organizations and people. Microsoft has clearly separated it from opponents like Slack by including a number of options, from Whiteboard to SMS messaging. It is no marvel Groups is without doubt one of the most used enterprise functions on this planet in the present day.
Editors’ Suggestions


