Genshin Impression’s Thoma is the sweetest cinamon roll you’ll ever meet. He additionally occurs to be a reasonably nice home husbando, and a decet four-star pyro polearm wielder with a terrific defend at larger funding. On this Genshin Thoma construct we check out his expertise, constellations, finest weapons, and extra, so that you may give him the respect he deserves in any case that arduous work he does across the Kamisato family.
Should you’re interested by different characters, ensure you try our Genshin Impression Hu Tao, Genshin Impression Diona, and Genshin Impression Sayu guides. We even have articles that define precisely what you’ll be able to anticipate from the upcoming Genshin Impression replace and the following Genshin Impression banner.
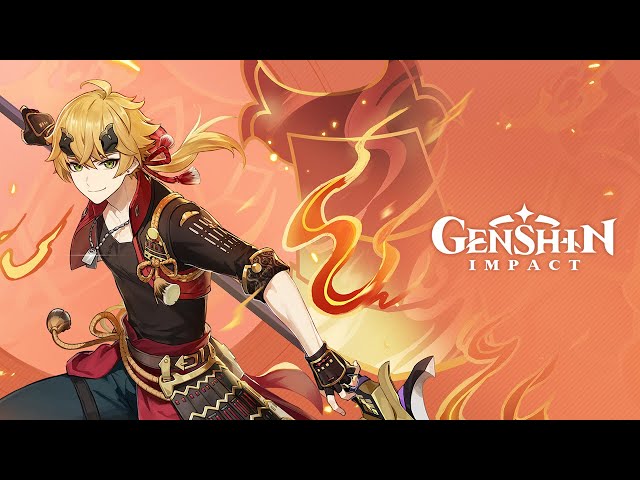
Genshin Impression Thoma
What’s the most effective Genshin Impression Thoma construct?
Thoma is a pyro assist character able to shielding his group along with his ability and burst, whereas additionally setting his enemies ablaze, shredding their defenses. He’s fairly situational, however at present has the second strongest defend at max stacks, and gives nice stagger resistance. He’s fairly cost-effective, requiring low funding and fewer resin to construct than different characters.
Nevertheless, he has extraordinarily excessive power recharge necessities, his injury and expertise don’t scale effectively, and he’s a reasonably area of interest possibility for many groups, which means he can normally get replaced by a stronger unit.
Don’t sleep on Thoma, although. Particularly within the present, dendro-heavy meta of Sumeru, he’s discovering a agency place amongst many elemental response groups.
Upcoming characters: discover out extra concerning the subsequent Genshin Impression banner
What’s the most effective Genshin Impression Thoma weapon?
Resulting from Thoma’s determined want for power recharge, we suggest equipping him with any weapons that enhance that stat. Engulfing Lightning is a superb selection for elemental interplay groups, resulting from it having each power recharge and elemental mastery, however is extra usually higher used on Genshin Impression’s Raiden or Genshin Impression’s Xiangling.
Alternatively, Favonius Lance is a superb selection, serving to you meet your power recharge necessities, however you want numerous crit price to set off its passive reliably. Should you’ve bought a spare Skyward Backbone, this additionally works to spice up his power recharge, however gives little else.
Exterior of the above, the Catch is the most effective free to play possibility, however, like Engulfing Lightning, is very contested by different characters. A great various is Kitain Cross Spear, which falls behind in its normal buffs, however is much extra inexpensive for a distinct segment character like Thoma.
| Weapon | Impact |
| Engulfing Lightning | Will increase assault by 28% of power recharge over the bottom 100%. You may achieve a most bonus of 80% assault. Acquire 30% power recharge for 12 seconds after utilizing an elemental burst |
| Favonius Lance | Crit hits have a 60% likelihood to generate a small quantity of elemental particles, which is able to regenerate six power for the character. Can solely happen as soon as each 12 seconds |
| Skyward Backbone | Will increase crit price by 8% and will increase regular assault pace by 12%. Moreover, regular and charged assaults hits on opponents have a 50% likelihood to set off a vacuum blade that offers 40% of assault as injury in a small AoE. This impact can happen not more than as soon as each two seconds |
| The Catch | Will increase elemental burst injury by 16% and elemental burst important price by 6% |
| Kitain Cross Spear | Will increase elemental ability injury by 6%. After your elemental ability hits an opponent, your character loses three power however regenerates three power each two seconds for the following six seconds. This impact can happen as soon as each ten seconds. Could be triggered even when the equipping character just isn’t on the sector |
What are the most effective Genshin Impression Thoma artifacts?
Should you plan to make use of Thoma on a soften or vaporize group, a 4 piece set of teacher is an efficient selection, resulting from its excessive elemental mastery. Nevertheless, it’s not with out its caveats. Teacher prices him his defend power, doesn’t provide power recharge, and the crit price he requires for Favonius Lance’s passive.
Alternatively, if nobody else has a set of Noblesse Oblige on the group, then it’s a very good possibility for Thoma. Simply be certain that you solely use this if Thoma has sufficient power recharge to burst often.
A very sturdy set combines two Tenacity of the Milelith with two Emblem of Severed Destiny, offering him with power recharge and HP% for his defend, although it may possibly value fairly a little bit of resin to get this set with all of the sub-stats you want.
| Artifact set | Impact |
| The Teacher | Two geared up: elemental mastery +80 4 geared up: will increase all celebration members’ elemental mastery upon triggering an elemental response by 120 for eight seconds |
| Noblesse Oblige | Two geared up: elemental burst injury +20% 4 geared up: will increase all celebration members’ assault by 20% for 12 seconds after utilizing an elemental burst. This impact can not stack |
| Emblem of Severed Destiny | Two geared up: power recharge will increase by 20% 4 geared up: elemental burst injury will increase by 25% of Thoma’s power recharge. A most of 75% bonus injury might be obtained on this approach |
| Tenacity of the Millelith | Two geared up: HP will increase by 20% 4 geared up: when an elemental ability hits an enemy, the assault of close by celebration members is elevated by 20% and their defend power is elevated by 30% for three seconds. This may be triggered as soon as each 0.5 seconds. It can nonetheless be triggered even when Thoma just isn’t on the sector |
Stat suggestions
Your precedence needs to be getting Thoma to at the very least 200-250% power recharge above anything.
Major stats:
- Sands: power recharge
- Goblet: HP%
- Circlet: HP% or crit price (crit price is vital right here in the event you’re utilizing Favonius Lance)
Sub stats:
- Power recharge
- Crit price (if utilizing Favonius Lance)
- HP%
- HP

What are Genshin Impression Thoma’s expertise?
Energetic expertise:
| Ability | Impact |
| Swiftshatter Spear | Carry out as much as 4 consecutive spear strikes |
| Swiftshatter Spear (charged) | Eat stamina to lunge ahead, dealing injury to enemies alongside the way in which |
| Swiftshatter Spear (plunging) | Thoma plunges from mid-air to strike the bottom, damaging enemies and dealing AoE injury |
| Blazing Blessing | Thoma launches ahead along with his polearm and delivers a flying kick that offers AoE pyro injury, whereas additionally summoning a Blazing Barrier. When Thoma casts Blazing Blessing, his elemental ability applies pyro to himself. Blazing Barrier: pyro injury is absorbed 250% extra successfully. When a brand new Blazing Barrier is obtained, the remaining absorption of an present barrier stacks, and the period is refreshed |
| Crimson Ooyoroi | Thoma spins his polearm, dealing AoE pyro injury and weaving himself right into a Scorching Ooyoroi. Scorching Ooyoroi: Whereas Scorching Ooyoroi is in impact, the lively character’s regular assaults set off Fiery Collapse, this offers AoE pyro injury and summons a Blazing Barrier. Fiery Collapse might be triggered as soon as each one second. Aside from the quantity of injury they’ll take in, the Blazing Limitations created on this approach are similar to these created by Blazing Blessing. If Thoma falls, the results of Scorching Ooyoroi are cleared |
Passive expertise:
| Ability | Impact |
| Imbricated Armor | Once you get hold of or refresh a Blazing Barrier, your defend power will improve by 5% for six seconds. You may set off this as soon as each 0.35 seconds |
| Flaming Assault | Harm dealt by Crimson Ooyoroi’s Fiery Collapse is elevated by 2.2% of Thoma’s Max HP |
| Snap and Swing | Once you efficiently fish in Inazuma, Thoma’s assist grants a 20% likelihood of scoring a double catch |
What are Genshin Impression Thoma’s constellations?
You’ll want to use one Stella Fortuna for every constellation you activate. You get hold of these once you obtain a replica Thoma from a want.
| Constellation | Impact |
| A Comrade’s Obligation | When a personality aside from Thoma that’s protected by his Blazing Barrier is attacked, Thoma’s Blazing Blessing and Crimson Ooyoroi cooldown is decreased by three seconds. This may be triggered as soon as each 20 seconds |
| A Subordinate’s Abilities | Crimson Ooyoroi’s period is elevated by three seconds |
| Fortified Resolve | Will increase the extent of Blazing Blessing by three |
| Lengthy-Time period Planning | After utilizing Crimson Ooyoroi, 15 power is restored to Thoma |
| Raging Wildfire | Will increase the extent of Crimson Ooyoroi by three |
| Burning Coronary heart | When a Blazing Barrier is obtained or refreshed, the injury dealt by all celebration members’ regular, charged, and plunging assaults is elevated by 15% for six seconds |

What are Genshin Impression Thoma’s ascension supplies?
Right here’s every part you want so as to totally ascend Thoma.
| Required degree | Mora | Supplies |
| 20 | 20,000 | One Agnidus Agate Sliver, three Treasure Hoarder Insignia, three Fluorescent Fungus |
| 40 | 40,000 | Three Agnidus Agate Fragment, 15 Treasure Hoarder Insignia, two Smoldering Pearl, Ten Fluorescent Fungus |
| 50 | 60,000 | Six Agnidus Agate Fragment, 12 Silver Raven Insignia, 4 Smoldering Pearl, 20 Fluorescent Fungus |
| 60 | 80,000 | Three Agnidus Agate Chunk, 18 Silver Raven Insignia, eight Smoldering Pearl, 30 Fluorescent Fungus |
| 70 | 100,000 | Six Agnidus Agate Chunk, 12 Golden Raven Insignia, 12 Smoldering Pearl, 45 Fluorescent Fungus |
| 80 | 120,000 | Six Agnidus Agate Gemstone, 24 Golden Raven Insignia, 20 Smoldering Pearl, 60 Fluorescent Fungus |
If you wish to be taught which characters are finest, be at liberty to take a look at our Genshin Impression tier record.


