Are you a fan of thriller and gaming? Why not mix the 2 on this theme-packed joyride referred to as Ghost Case? It has horrible homicide incidents, a down-to-Earth detective, and a convincing case.
Nonetheless, the sport itself can very tough, and the area of interest participant base makes it powerful to discern whether or not the sport is definitely price enjoying or not.
So, on this Ghost Case Walkthrough, we might be taking an in-depth have a look at the whole story of the sport.
So put on your detective hats, as we’re about to take a deep dive into Ghost Case, the whole walkthrough!
Ghost Case Walkthrough – Format Explainer
The sport Ghose Case is split into three sub-sections spanning over 44 minutes of gameplay.
Now, to be able to make every thing easy, we are going to try to comply with the identical step-by-step sequences as within the story.
A lot of the in-game strikes might be made by faucets.
So even when it isn’t talked about, contemplate performing actions that manner.
Equally, the sport affords randomized riddles, so our model and yours may differ!
Now, if that’s gotten you riled up, then let’s start!
Ghost Case Walkthrough
Right here is the whole Walkthrough of Ghost Case:
Introduction
The sport begins by showcasing the plot:
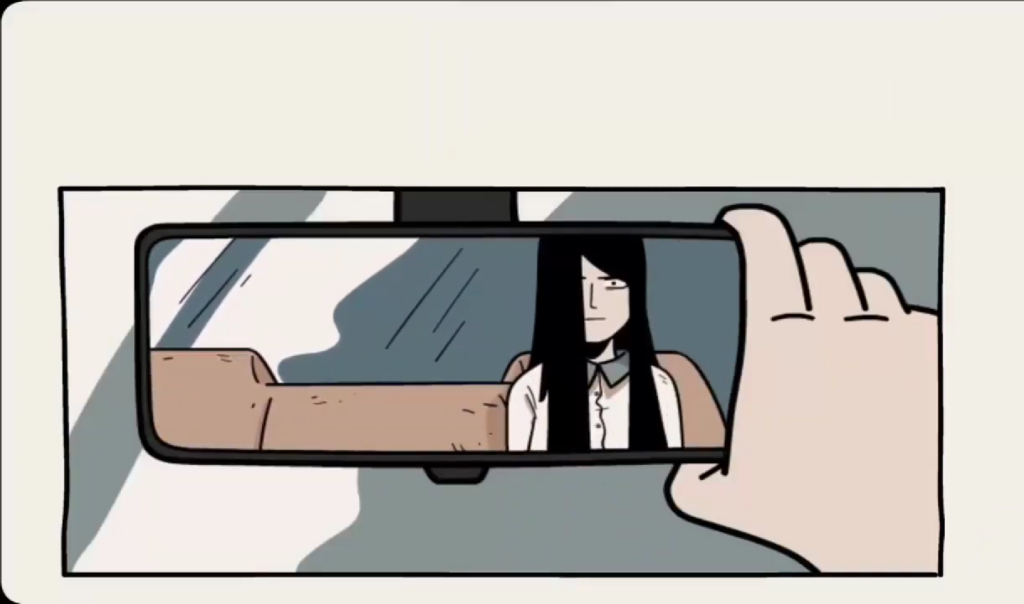
There was a horrible incident 20 years in the past. A contemporary detective named Ren Arsen acquired unusual cues from the afterlife concerning the incident.
Then the scene pans over displaying a lifeless woman displaying up randomly within the rearview mirror of his automotive, after which disappearing.
An analogous scene ensues as soon as once more when the detective is working, his file folder drops over randomly.
The intro then talks about how the soul of the lifeless sufferer shouldn’t be at relaxation.
The detective then scans the field to search out all of the homicide incidents that occurred 20 years in the past.
Ren feels a related premonition that there’s one thing occurring.
Maybe, the souls of the lifeless victims will not be at relaxation.
They need to be heard greater than ever!
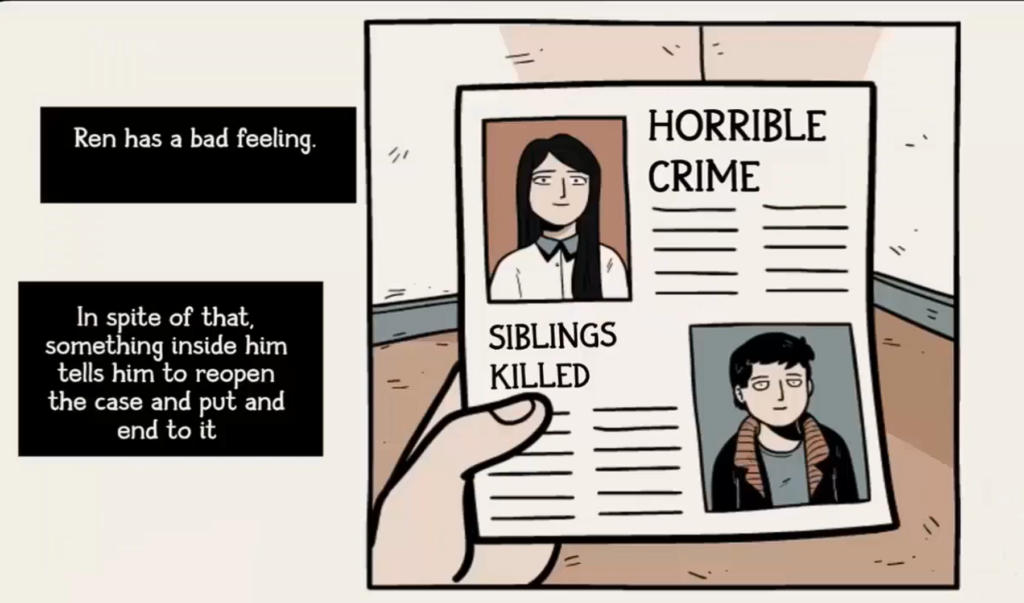
Understanding the cues, the detective opens these previous information to as soon as once more remedy the thriller of these murders and to assist these spirits discover the remainder they deserve.
Begin
The beginning of this story occurs within the police station – within the detective’s workplace the place all of the information are positioned.
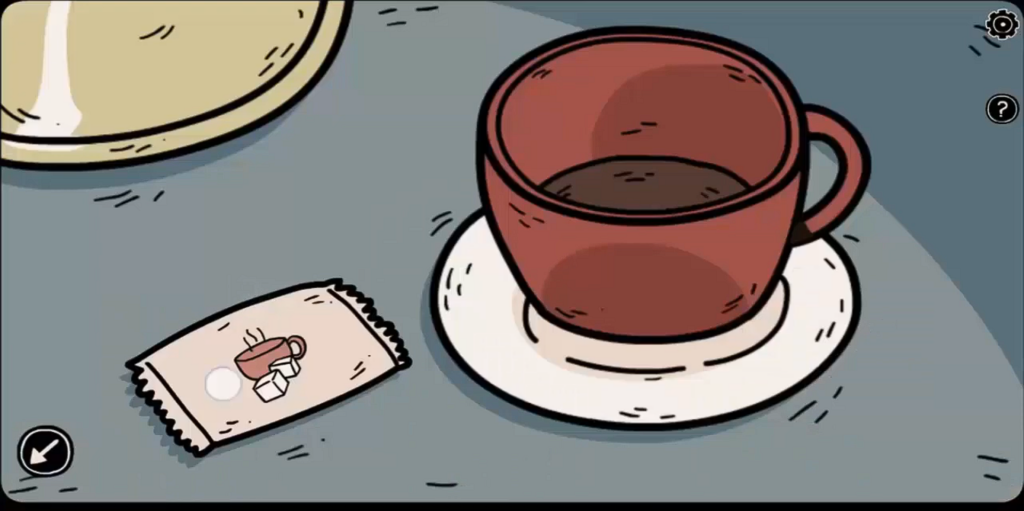
You must examine the scenes to search out hidden cues from the room.
- The primary one is current close to the espresso cup. Simply faucet on it to have the sugar packet revealed, and mechanically saved in your stock.
- Subsequent, transfer by the scene to go to the center drawer towards your desk to be able to get a extra in-depth have a look at its contents.
It would open up upon tapping and can reveal an previous map pointing towards someplace.
Similar to the sugar packet, the map may also mechanically go into your stock. Simply faucet it from there to open it.
There might be two places on this map.
In contrast to old-school reasonable maps, this one incorporates details about all of the places you’ve surveyed up to now.
At the moment, it solely incorporates the Police Station and the Homicide Home.
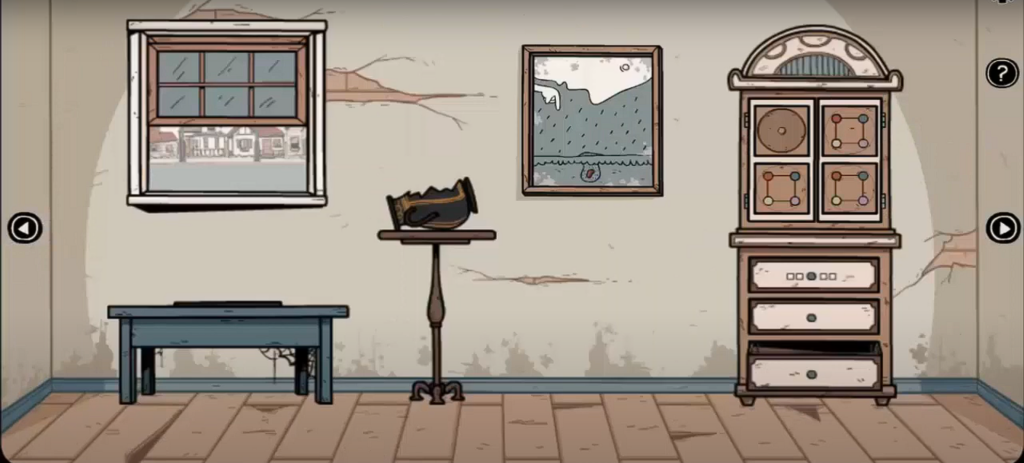
Now, simply faucet on the Homicide Home to go there, and check out shifting inside the primary room to search for clues.

The home windows on the cupboard appear to be locked.
Strive tapping on them to open them and reveal the contents inside.
Unsurprisingly, there’s a bizarre window photograph positioned inside.
You have to to faucet on it to view it, after which head again by urgent the arrow within the left nook.
Except for the cupboard, this room additionally incorporates a desk with a tape recorder and a display.
There are certain to be some clues in there!
Faucet on the wires to have “A Plug” mechanically added to your stock.
Now, it’s time to proceed to the subsequent room.
Repeat the cupboard course of as soon as once more to search out extra pictures.
Do be aware although that these pictures will not be straight associated to the case, so you’ve got the choice of letting them be.
However if you happen to’re trying to full all of the achievements as nicely, then will probably be advisable to not miss a single one in every of them.
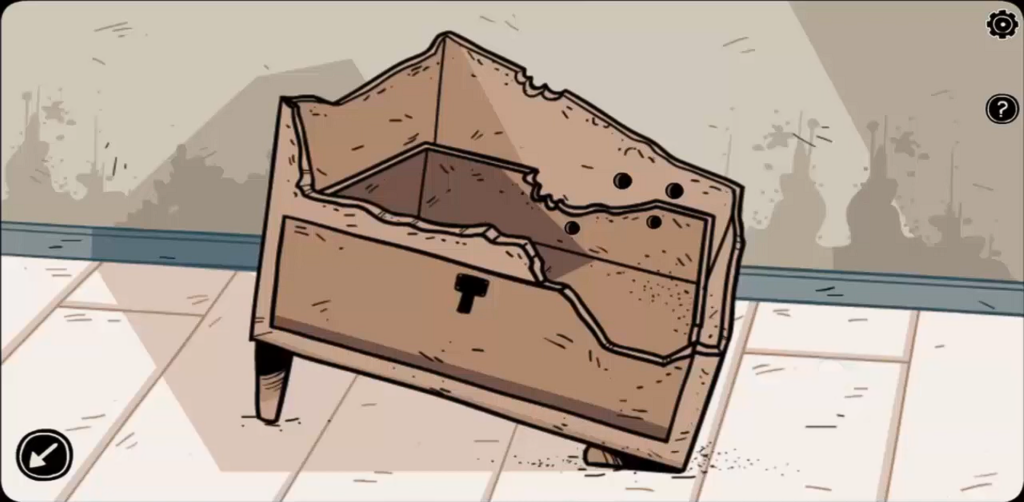
Now, it’s time to maneuver towards the subsequent room. Right here, you’ll discover a damaged bottle contained in the desk.
Simply faucet on the desk first, after which the bottle to pull it to your stock as this is usually a useful clue!
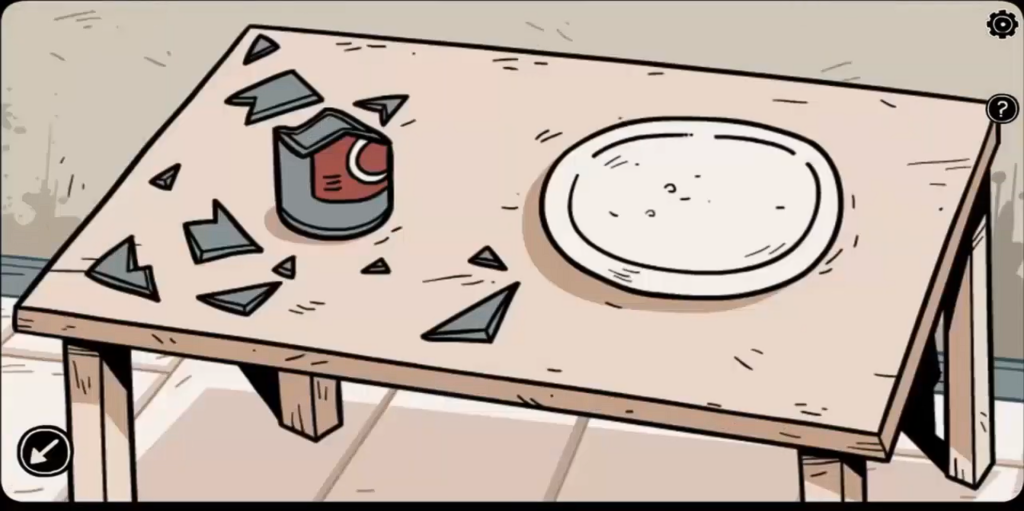
There appears to be a number of damaged furnishings right here.
Faucet on the damaged bottle in your stock, and place it contained in the damaged furnishings to attempt to re-enact the state earlier than the crime scene.
There appear to be 4 holes contained in the furnishings.
These appear to have been the by-product of termites.
Do not forget that sugar packet from earlier than? Now, place it contained in the damaged bottle to lure all the termites inside.
This may be achieved by:
- Tapping on “A Sachet of Sugar” out of your stock.
- Tapping the bottle on the damaged furnishings.
The termites will begin speeding into the bottle.
Looks as if our future-sightedness paid off!
We’re going to take a look at them later, so faucet on this bottle to be able to retailer it again in your stock.
Now, it’s time to go to the subsequent room.
Press the button on the backside left as soon as once more to go again to the primary room.
Now, our very first challenge with this room was that the door in entrance was locked because of the patches of wooden slabs being nailed on it.
Now, what makes wooden go away? Termites! Fortuitously, we occur to have an sufficient quantity of them.
Faucet on the “Damaged Bottle of Termites” out of your stock after which do a light-weight faucet on the wooden on the door to sprinkle them in.
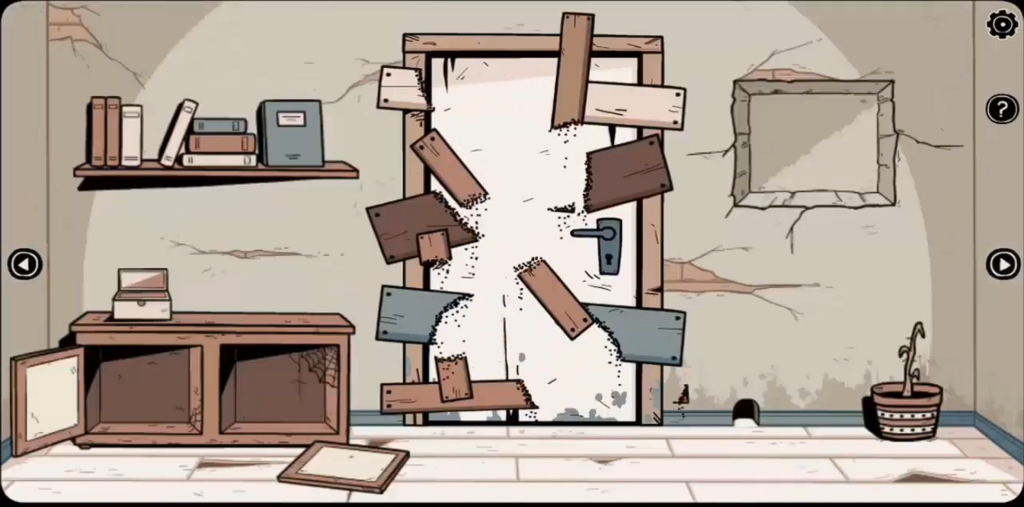
In contrast to actuality, these termites certain do work tremendous quick!
Now that the door is opened, it’s time to go inside to disclose what occurred right here.
This may be achieved by a easy tapping motion.
When you’re inside, check out the black spot on the base of the lamp.
The cable appears to have been pulled off and discarded someplace.
Fortuitously, we’ve got simply the answer!
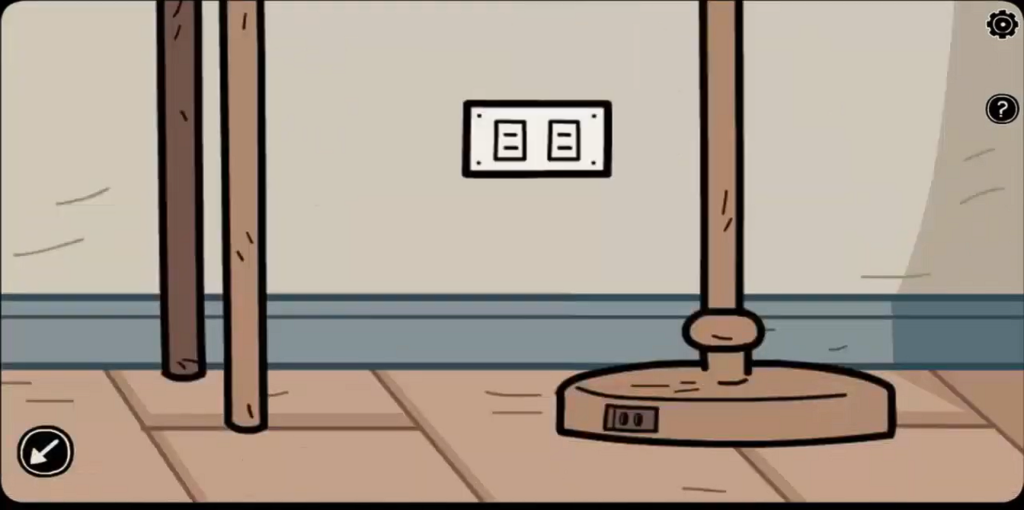
Faucet on the “Plug” out of your stock, then faucet on the lamp to be able to get it fastened.
If the automated magic doesn’t occur, it may be since you not particularly tapping on the bottom.
Sadly, including the bulb was not every thing you’ll want to get the lamp working. It’s been 20 years, there’s no bulb within the socket.
So how do we discover them? For now, let’s simply bear in mind this and proceed additional with our exploration.
It’s time to proceed to the subsequent room.
Simply faucet on the door In entrance of you to go inside.
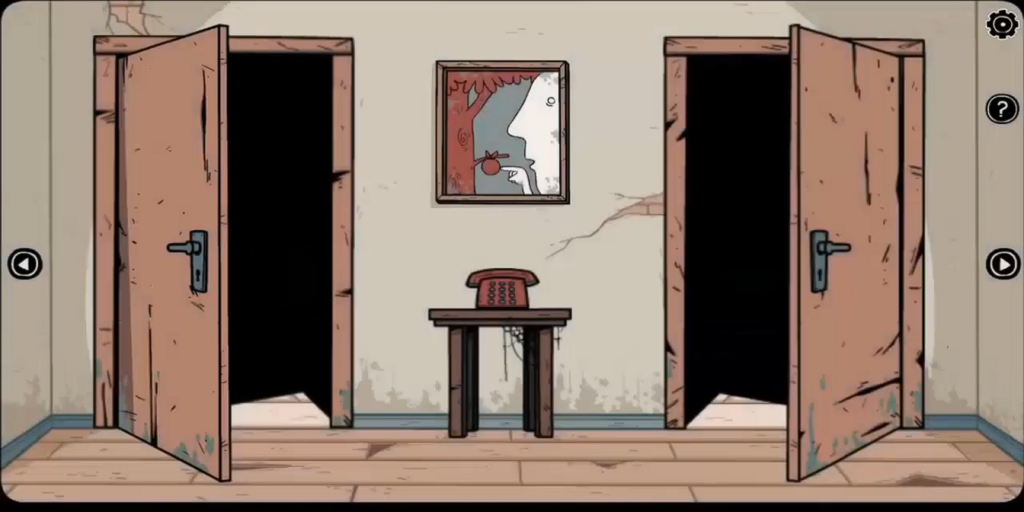
Now, there appear to be two doorways, with the fitting one being closed and the left one having a ghostly determine protruding outwards.
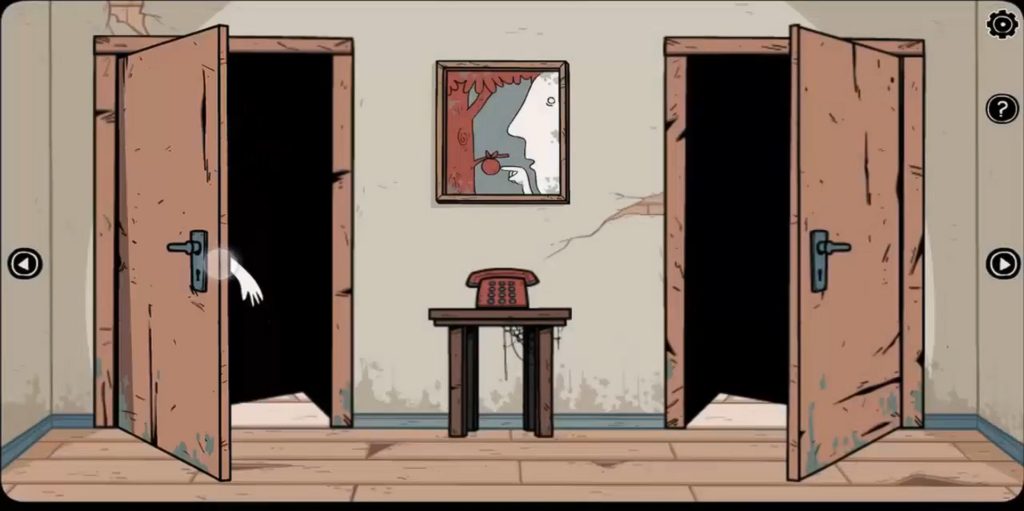
Faucet on the door with the determine to discover a bed room with a drawer and two cupboards.
The remainder seems to be fairly inventory customary as to what one will discover in a homicide scene.
Now, it’s time to look contained in the drawers.
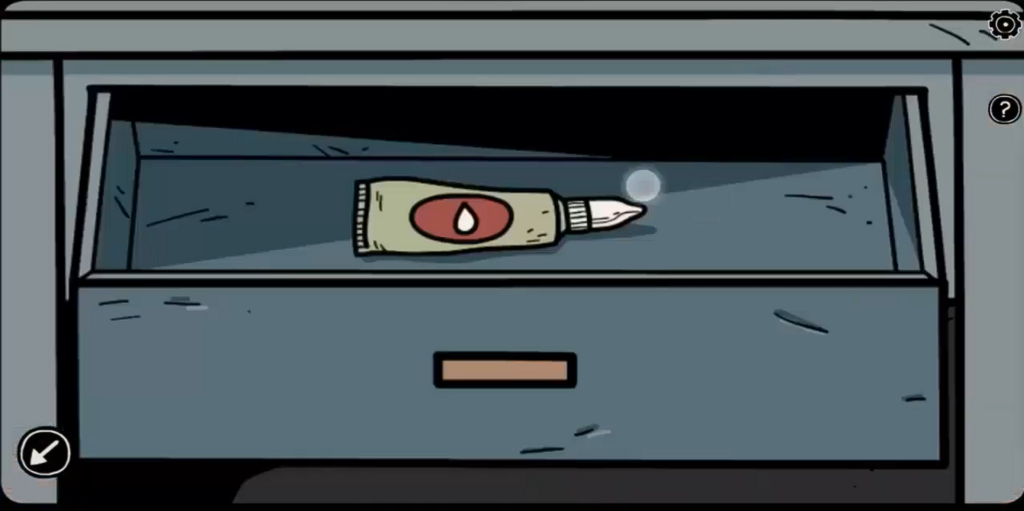
Faucet on the center drawer to open it, and reveal the Glue inside.
Faucet on it as soon as once more to retailer it in your stock and head to the room view to take a deep have a look at the aquarium and the left image on the wall.
We’d suggest you save a screenshot since these two hints might be essential within the upcoming sections of the sport.
Now that the ghost room is completed, head again, and take a deep have a look at the picture of a person pointing on the apple on high of the phone stand.
When you’ve gotten that in your reminiscence, head to the door on the fitting by tapping.
That is one other room with a desk and an vintage clock. Let’s start by exploring the desk first.
We have now yet one more image and a locked drawer.
There’s a e-book on high of it that appears to be locked up.
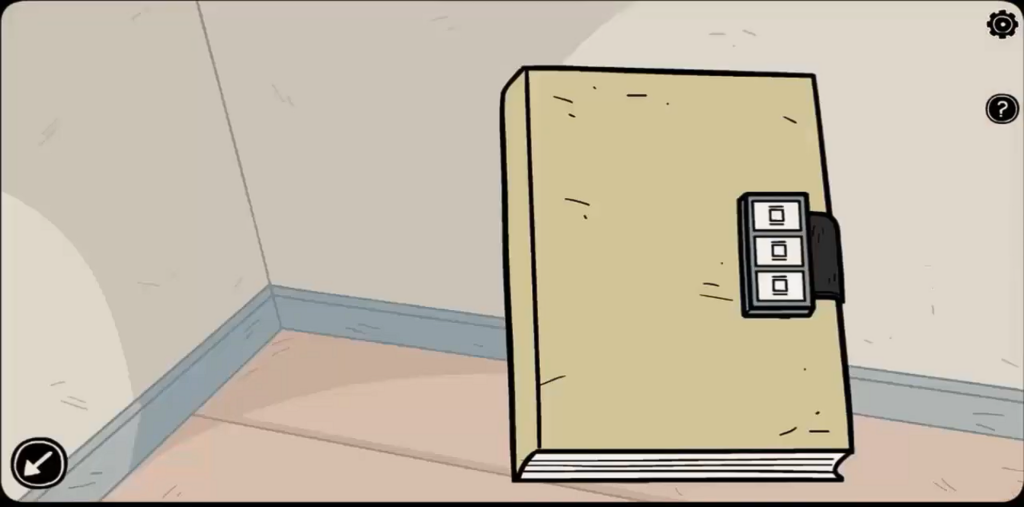
There appear to be two symbols within the lock house, so naturally, it’s going to require a mix of three numbers to unlock.
Retailer this e-book in your stock, and proceed to go away this room.
Now that we’ve checked each rooms, faucet the fitting arrow in your display to maneuver to the subsequent room on the fitting.
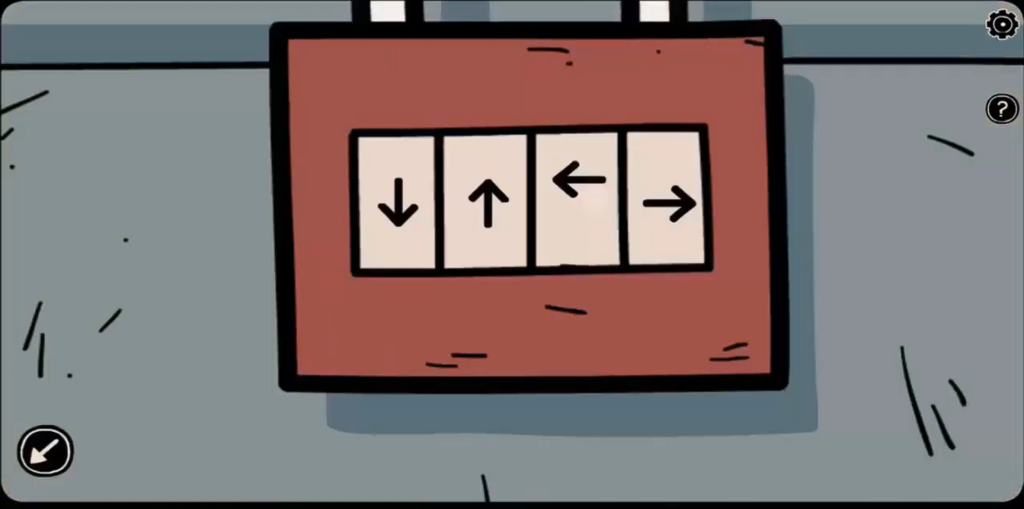
There appears to be a chest of types with a padlock on it.
In contrast to the e-book, there are 4 arrows right here.
Now, if you happen to occur to recollect all the images, fixing this ought to be a bit of cake.
Because the order of the images was random, your mixture may differ.
Simply bear in mind the instructions wherein the hand within the image was pointing.
Rotate the arrows within the padlock accordingly, and also you’ve just about achieved it.
However wait, we’ve solely discovered the images, and there are 4 arrows, in order that should imply there’s some type of trace for the order as nicely.
Can we undergo the door on the left or the range to the fitting? No. However are they associated to one thing? Sure.
Head again to the final room we’ve discovered an image in, and attempt to take a better look.
Bear in mind, the images all have a picture of a plant that determines its slot within the arrow sequence.
For instance, the image containing a seed should imply that the course laid out in it should be the primary of the bunch.

Do the identical for the remaining pictures, however earlier than getting out, take a deep be aware of the chessboard current on the left facet together with the big cupboard that seemingly has one other puzzle on it.
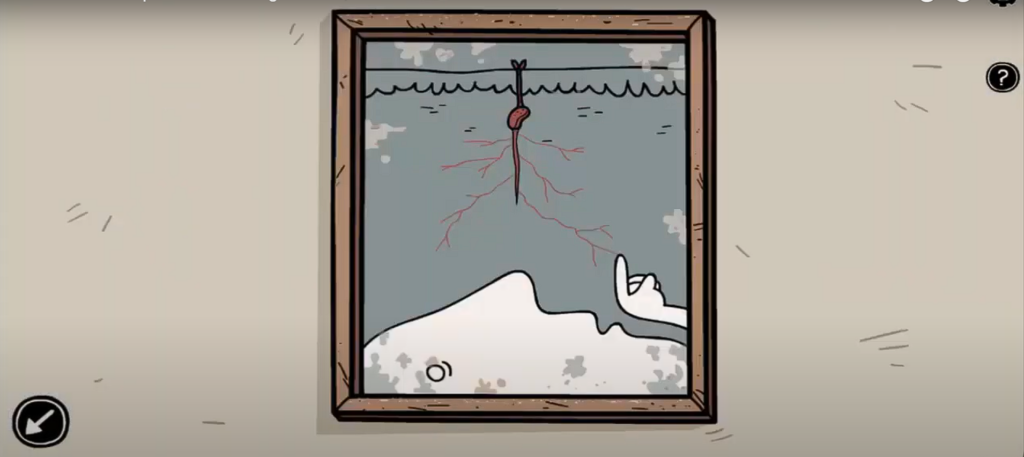
Now, the second puzzle ought to have the seed with the roots rising out of it.
Memorize the course of the arrows right here, and proceed to the third one.
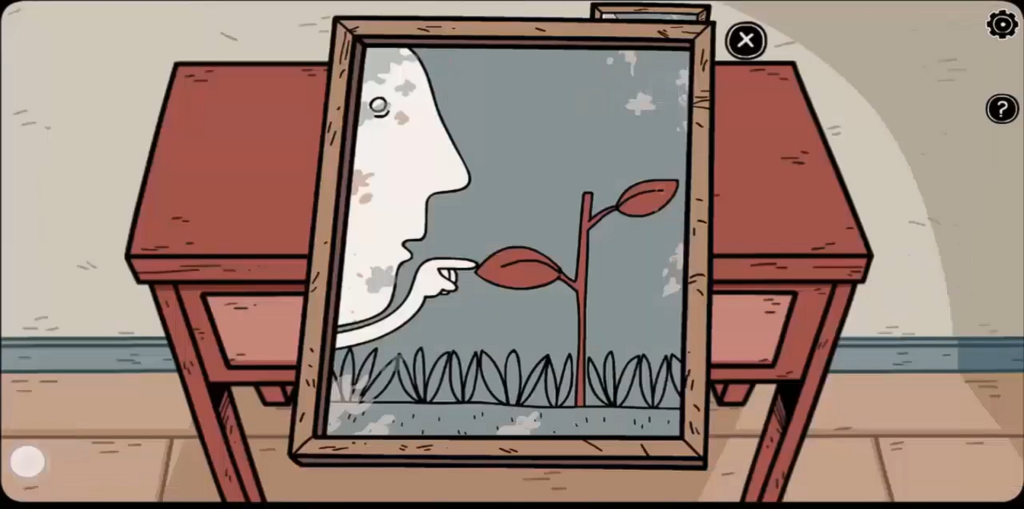
This could have a small plant. Naturally, you’ll want to memorize this course as nicely.
Within the ultimate image, it is possible for you to to see an entire apple being sprouted.
You’ve gotten the sequence and the instructions for all of the arrows, so head again to that room, and dial the sequence in!
Because the chest is unlocked now, it’s time to have a look inside to see what we acquired.
If we bear in mind appropriately, we would have liked some gentle bulbs, so decide that one and retailer it in your stock.
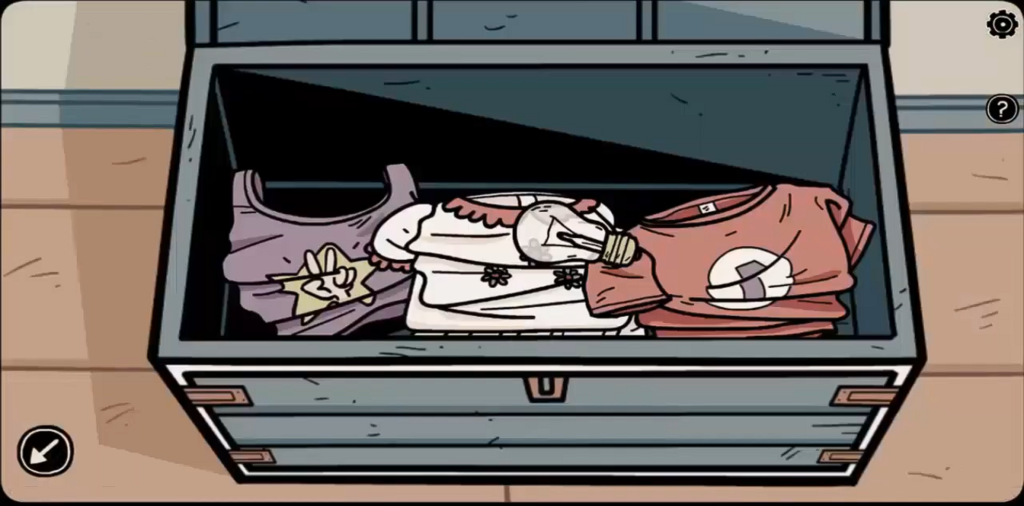
However that may’t be it, proper? Appropriate. Faucet on the shirt with the #1 printed on it in purple and study the internal tag.
There appears to be an emblem there.
If we recall appropriately, our e-book nonetheless must open.
Since we acquired one image down, there are solely two extra to go. Similar to the dimensions of the plant, there’s order right here as nicely, so the #1 should imply that is the primary image.
Bear in mind it, and press X in your keyboard, or controller to place it down.
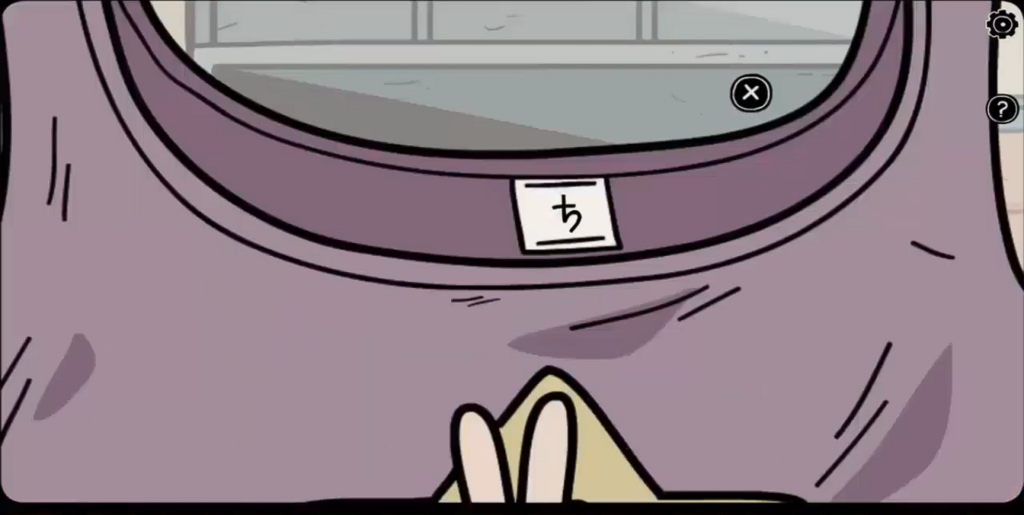
Now, decide up the shirt with a hand making the peace signal. The rationale? It has two fingers, so it should be the second of the order. Repeat the method, after which bear in mind the tag.
Now, transfer to the shirt with three flowers on it, and do the identical as soon as once more.
Subsequent, take the e-book out of your stock, and enter the found symbols to be able to unlock the e-book!
Let’s begin studying the contents of the e-book, and see what we will discover out.
The primary web page appears to be a hand-drawn image of a teddy bear, inventory stuff for a toddler.
Transferring onto the subsequent web page, there appear to be some bizarre arrows.
Something bizarre on this sport is vital data, bear in mind these, or simply take a screenshot if you happen to don’t need to trouble checking it once more.
Now, proceed to the subsequent web page, and viola, there are some extra clues to be discovered.
Trying on the robotic to the left, it looks like there are three sorts of shapes:
- Circles
- Squares
- Triangles
Memorize this association, as it’s going to come in useful in a while.
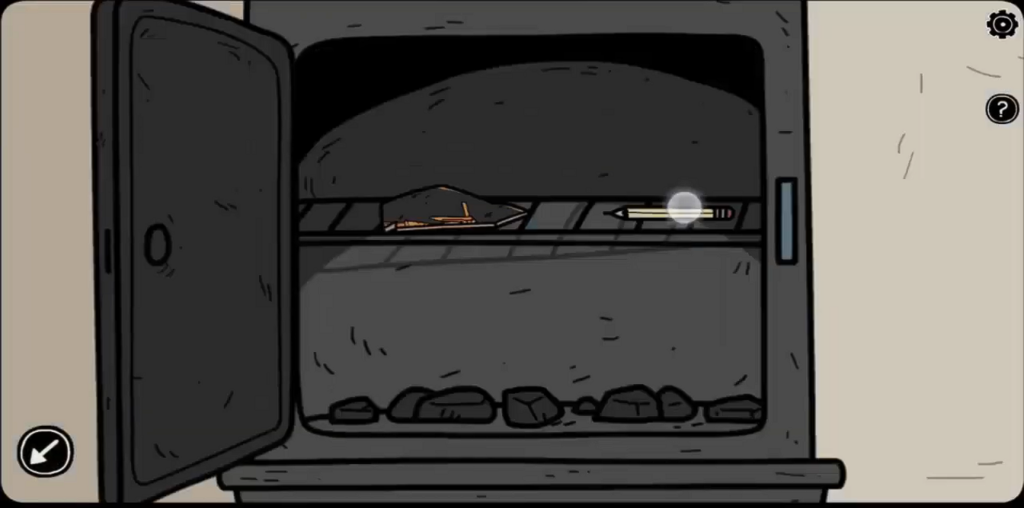
To not drag issues any additional, head again to the room with the range, and faucet on the symbols current on the range.
A mixture of circles, squares, and triangles, what a bizarre coincidence! or is it? Change the colour of the symbols to match those current on that robotic within the e-book to unlock the range.
Inside, there appears to be a pencil, a vase, and a few coal. Drag all of them into your stock in a single massive tapping motion.
Bear in mind the damaged vase? Yeah, it’s time to go remedy it!
Head again to the room, and use the glue current in your stock to hitch the items collectively. Hmm, there appears to be a bit lacking.
Would you wish to take a better have a look at the highest of the fitting drawer? Appears to be one other mixture lock. It’s time to make use of the knowledge within the e-book as soon as once more to search out the solutions.
Hold flipping the pages, till you attain the torn web page.
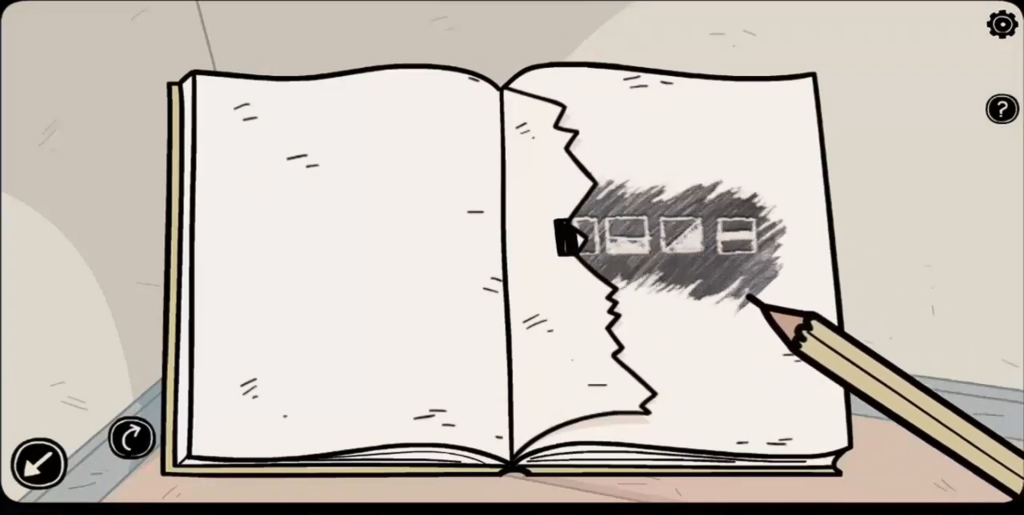
Use the pencil out of your stock to frivolously shade the subsequent web page, revealing the contents on the torn-out web page.
Memorize the sq. sample, and fill it accordingly!
There appear to be three gadgets on this drawer. A e-book, a token, and a few type of a sensible card.
Now, sweep them in your stock, after which open the purple e-book to discover a bunch of fish drawn on one in every of its pages.
That is your clue to fixing the vintage clock from earlier than.
In any case, clock the e-book for now, and attempt to open the underside drawer.
There appears to be a pawn inside. Choose it up, and head again to the blue desk.
Go away your items or tokens on the board above the desk, and transfer to the subsequent room.
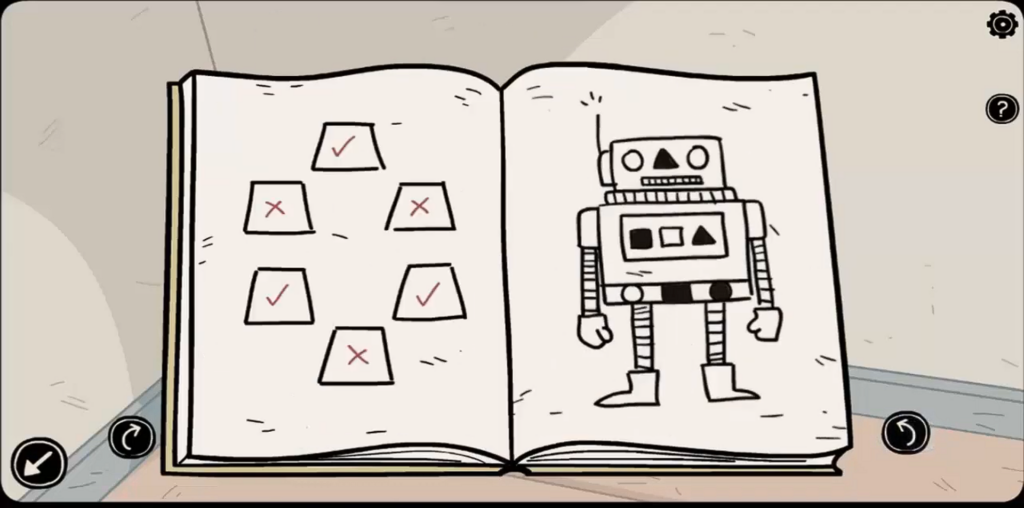
Have a look at the chandelier within the room, and open your unlocked e-book to the left facet of the robotic web page to disclose a sample of the lampshades.
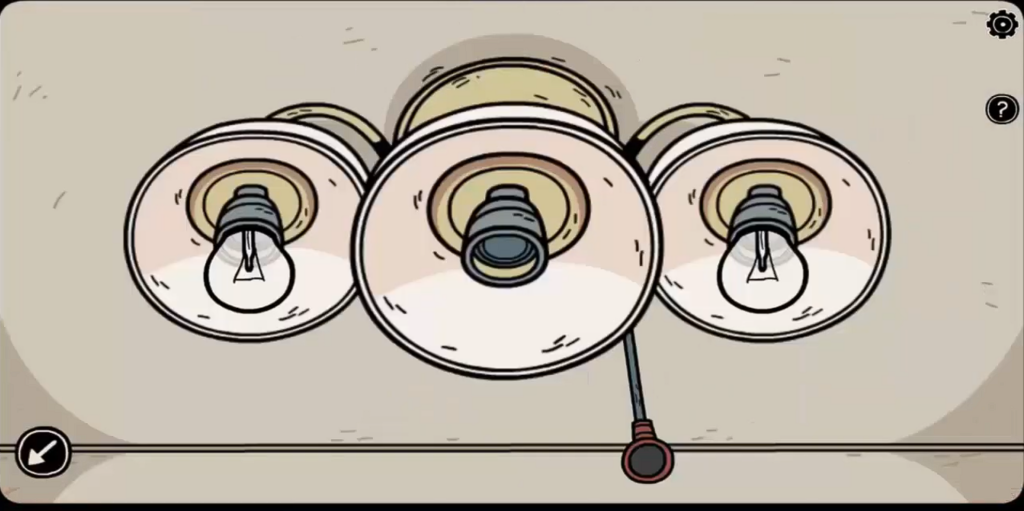
Take a deep be aware of the checkmarks, and begin inspecting the lampshades.
There appear to be two lightbulbs inside, with one housing empty.
We occur to have simply the factor for that. However as a substitute, let’s take one out, with the opposite matching the sample within the e-book.
Bear in mind the lamp within the first room? Yeah, it may use some assist. Earlier than heading there although, let’s take a detour to make use of the helpful sensible card we discovered.
Go to the room with the fish tank, and slide it within the slot of the fitting desk cupboard.
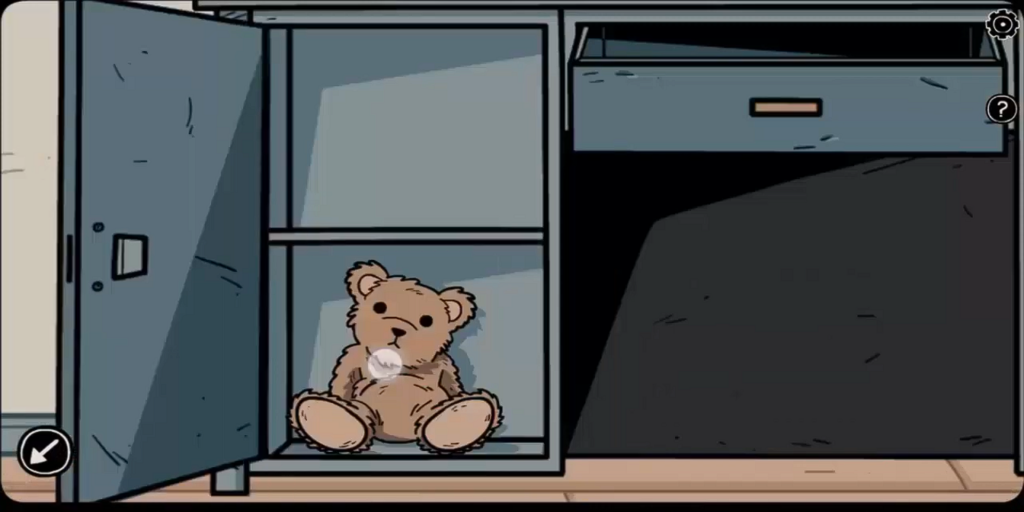
Tapping the door will reveal a teddy bear inside.
We’ll have a look into that later.
For now, go to the lamp so we will slot the 2 bulbs in, matching the sample within the e-book.
Now, simply flip the change on for an additional cutscene to ensue.
The woman from the automotive appears to have appeared within the mirror, and she or he appears to be stretching her palms to one thing – as if she’s asking you to offer what’s hers.
Oh, ya! the teddy bear! You could have one in your stock, give it to her and watch her disappear as some numbers pop up within the mirror.
Take a screenshot, or memorize these as they’re going to be crucial for the upcoming future.
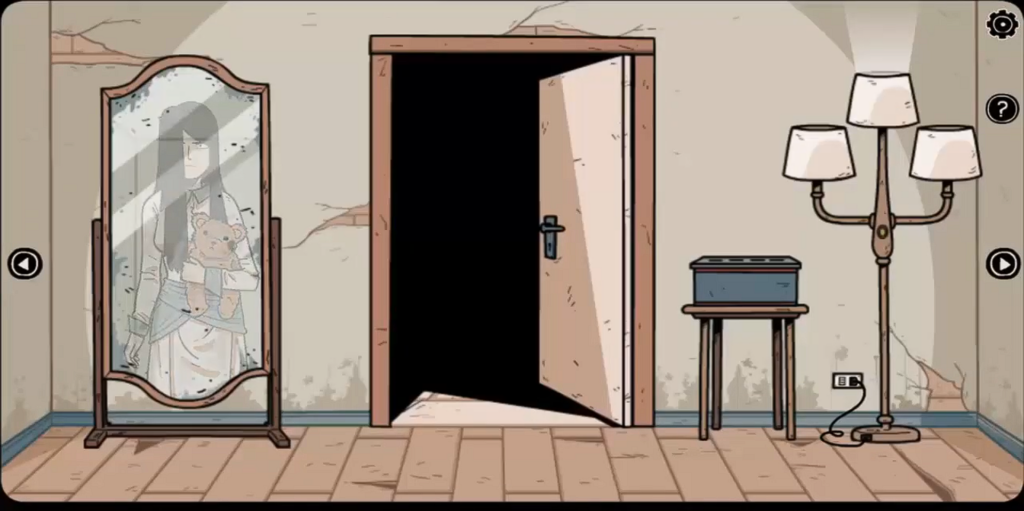
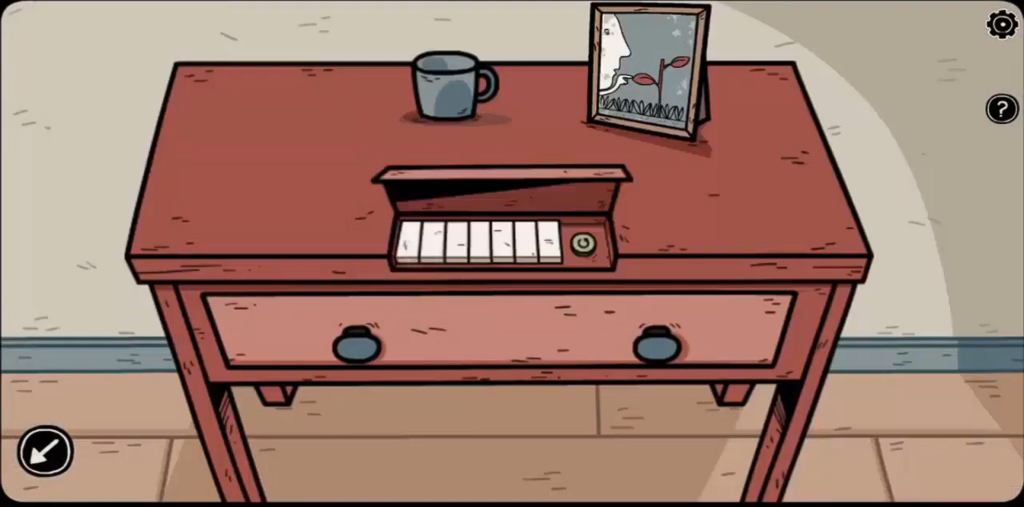
Transfer to the room with the phone, and dial these numbers.
The telephone ought to be ringing a novel melody that we have to as soon as once more bear in mind.
Now, transfer to the room to the fitting, and faucet on the light-shaded lid on the desk.
There’s a piano inside. Now play the melody you simply heard to perfection to unlock one other secret.
As soon as the melody completes, the ground beneath might be unlocked – revealing an arrow dart and a vase piece.
Head again to assemble the dart, however earlier than that, contemplate in search of the owls, as you’re going to be seeing yet one more ghostly determine.
It may be seen by opening the window within the room.
Simply faucet on it to have a clearer view.
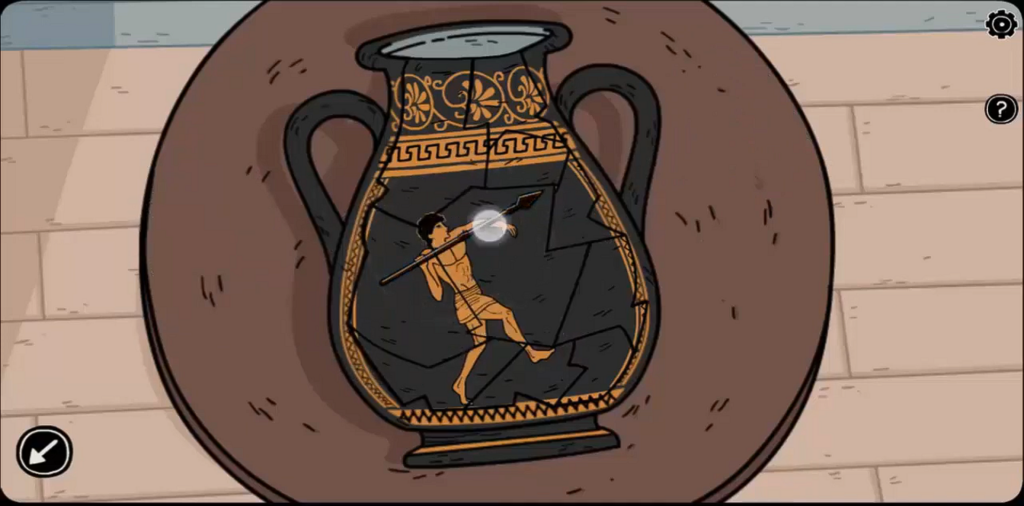
Now, return and restore the vase to see a design of an individual throwing a spear in a sure course.
Let’s memorize this because it’s in all probability going to be helpful in a while.
Now, change rooms to achieve the clock, so we will recover from with that puzzle as nicely.
Because the second hand is already in place, we solely want so as to add the hour one.
Looks as if we have already got that in our stock, so simply use the tap-tap sequence to fit that in.
We nonetheless don’t know the place these palms ought to be although.
Fortunately, you’ll be able to verify the minute hand from the purple e-book, and the minute hand from the course of the hand of the person within the Vase design.
Now connect the hour hand on the clock, and open the unlocked e-book to be able to decide its place.
Bear in mind the arrows web page? Match its course with the identical form within the arrows, and also you’re good to go!
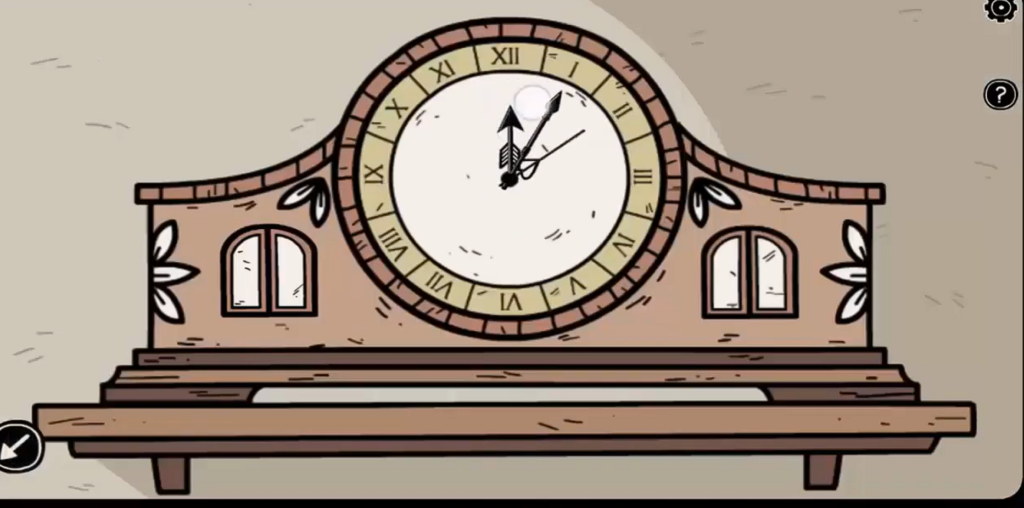
Because the clock is working now, a small humanoid statue will come out on the left side- presenting you with a key.
Naturally, put it aside in your stock, and faucet the fitting door to search out one other owl.
Now, it’s time to go to the room with the fish tank and open the fitting desk cupboard.
Insert the important thing you simply discovered within the gap, and seize the fish meals and the board piece.
Use the meals within the fish tank to feed them.
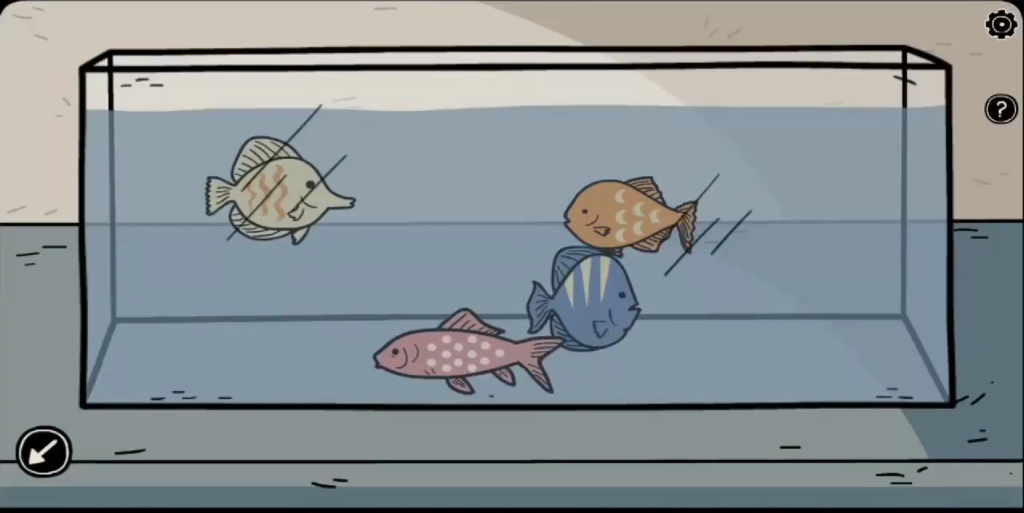
They are going to change shapes to one thing we’ve seen earlier than.
Within the purple e-book, there was a web page ordering these from 1 to 4, bear in mind the order, and the colour and patterns on the fish.
It’s going to be very integral shifting onwards!
Subsequent, head again to the room the place the woman confirmed up with the quantity, and work together with the blue field close to the lamp.
Use the fish ordering and the patterns to fill the lock on the field, and seize the pawn inside.
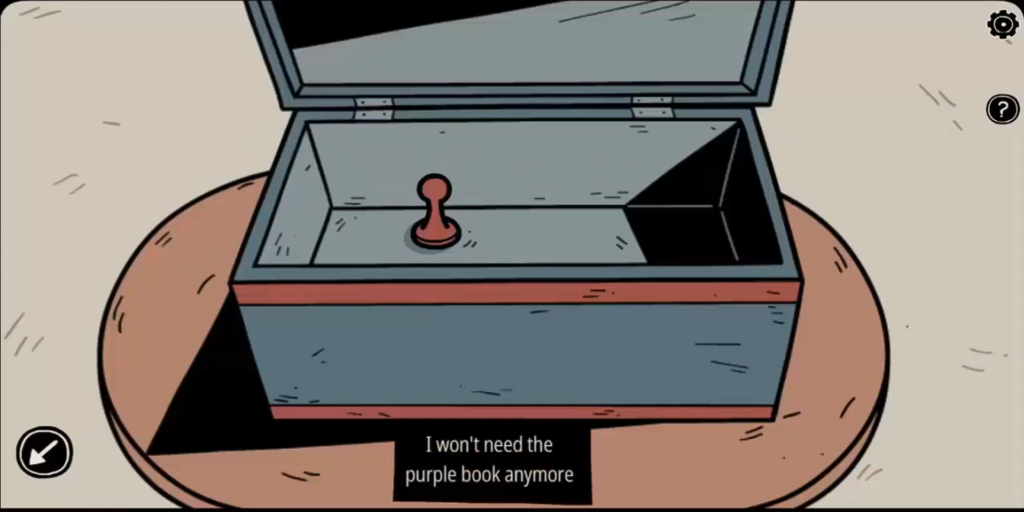
Counting the 2 on the board, we now have 4 items.
Excellent for fixing yet one more riddle. Now, go to the room the place we fastened the vase and check out the cupboard.
Then head to the board, and place the 2 tokens in your stock on the board as nicely.
As quickly as you do this, the ghost of the boy will present up re-arranging the tokens and leaving a round disc.
The boy then seems to be at you and factors towards the desk.
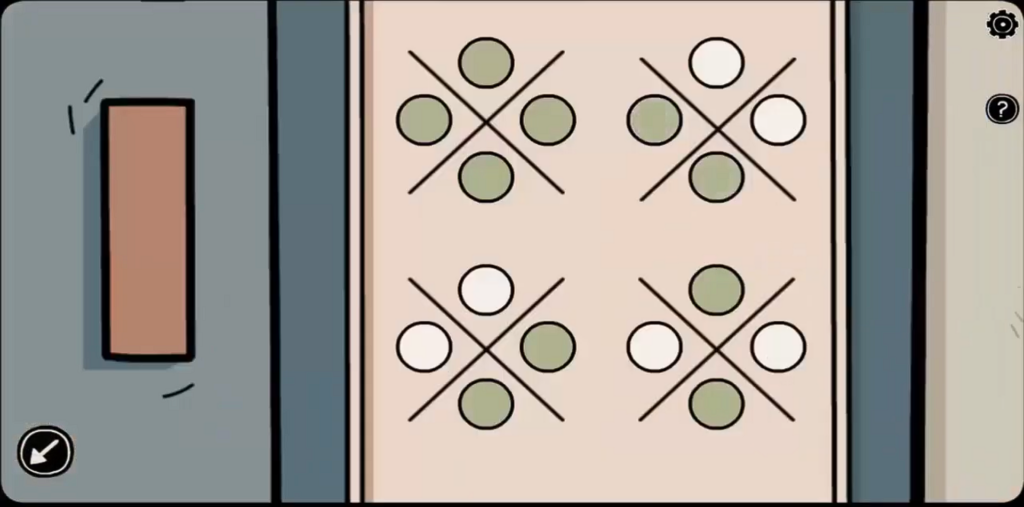
Ignore it for now and attempt to memorize the colour of the pawns together with their place if we need to clear this puzzle.
Go to the cupboard for now, and prepare the place and the colour of the pawns accordingly.
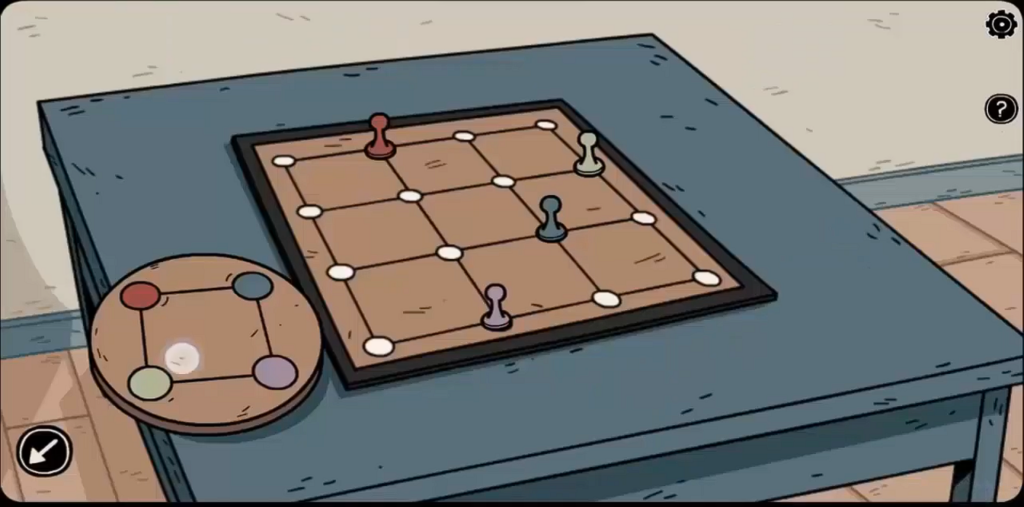
The primary tile within the cupboard appears to be missing one thing round; Similar to the disc the boy left us. Choose that up and place it there.
Subsequent, begin rotating the tiles such that the colour of the circles ought to match the colour of the board.
You possibly can faucet on the 4 circles to rotate them till you obtain that.
As soon as unlocked, the cupboard will open, and reveal an envelope with the textual content “Lian”, and a few projector slides.
Getting there, aren’t we?

With plenty of clues in our pockets, it’s time to go again to the “Police Station”, and kind out every thing.
Use your map to go again, and wait on your stock to vary.
From there, select “Projector Slides”, and faucet the white button in your projector.
The primary picture will present the lifeless boy gaming together with his buddy whereas the subsequent slide will instantly lead us to each youngsters about to go to high school.
Apparently, the detective is aware of that buddy. It’s time to go to his house to see what’s up.
Simply to make sure, cycle by the whole slide record to be able to discover yet one more owl. Be sure you go previous the clean ones as nicely.
Your map has a brand new location now, head to Lian’s home.
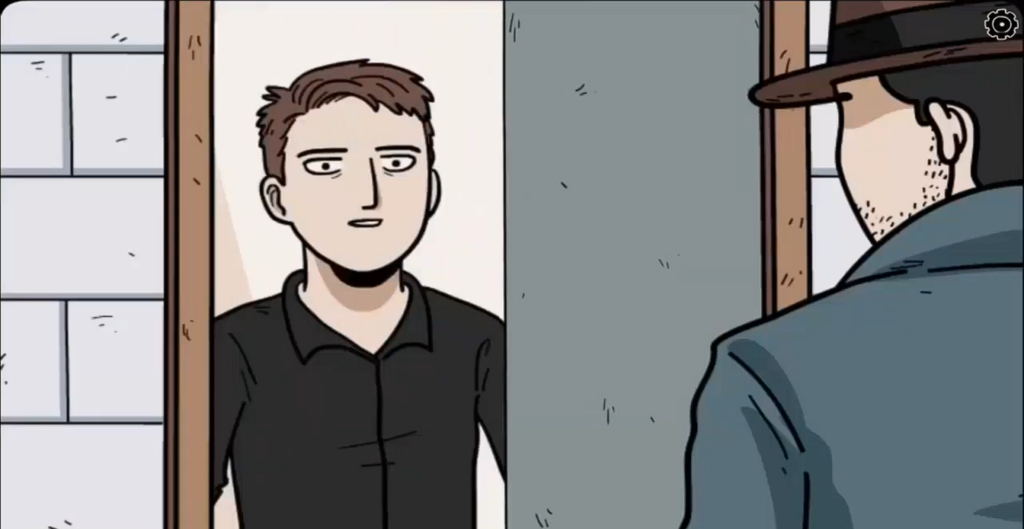
Naturally, Lian doesn’t need to discuss in regards to the incident, however fortuitously, we occur to have a letter.
Simply slide it in (utilizing some tapping), and let the magic occur.
There’s one other personal on Lian’s mug by the best way.
Looks as if the murdered youngsters have been very pleasant, they usually felt persecuted some time earlier than their loss of life.
They appear to have seen “shadows” and whatnot earlier than their loss of life, and their ultimate days have been then appearing very unusually.
Proceed biking by the questions, to search out out that the youngsters hardly ever left their home out of worry.
The letter stated “It wasn’t your fault”, with the reason is Lian, Dan, and his sister visiting the cemetery on account of Lian’s curiosity.
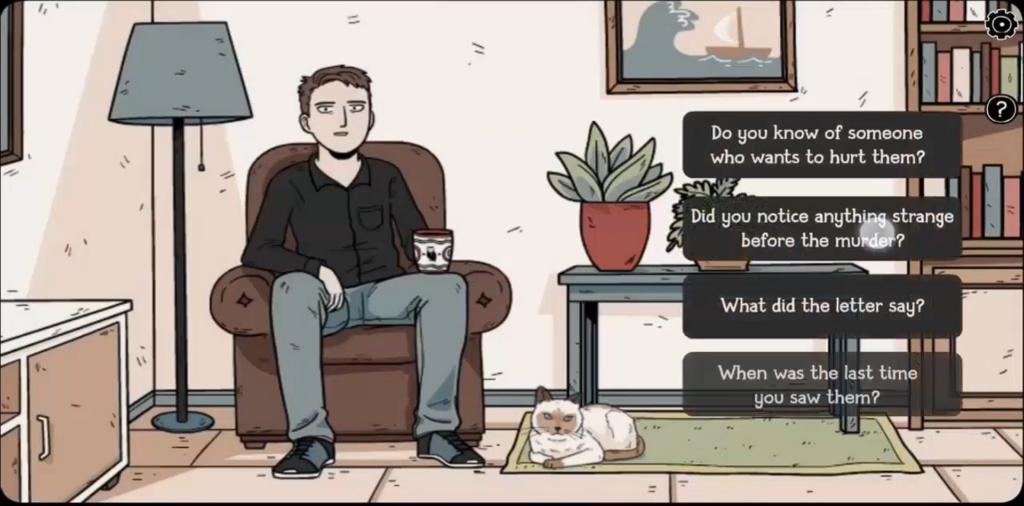
After this go to, Dan and his sister’s conduct modified drastically, as in the event that they have been afraid of one thing.
Time to get one other clue!
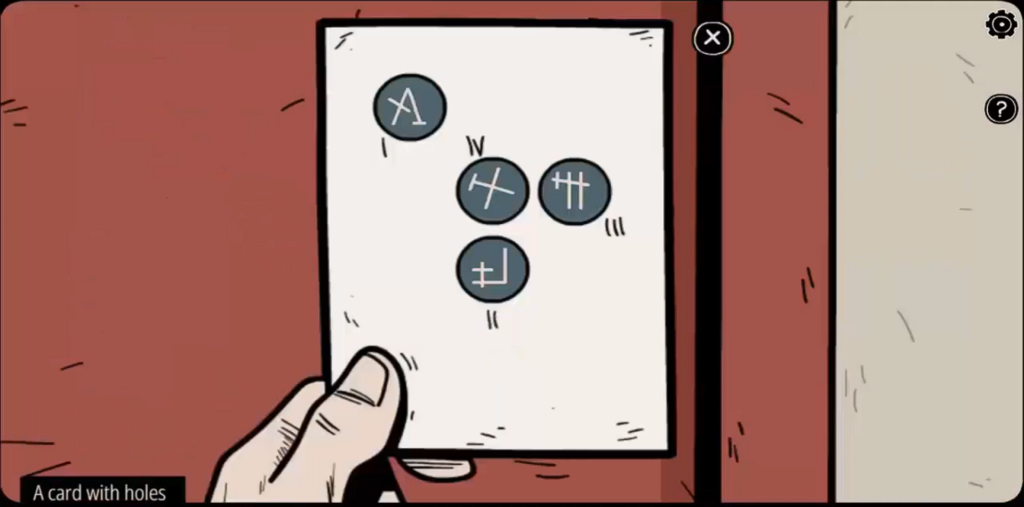
Apparently, earlier than the homicide, Dan handed Lian a e-book that contained a card stuffed with holes.
He has no clue, however you do! Take it from him, and retailer it in your stock.
Bear in mind the room with the range the place there was a locked room? Head again, and hint the outlet sample on the cardboard to the lock to be able to open it (roman numbers point out the urgent order).
Simply faucet on it and head inside.
Contemplating there’s much more occurring on this room, it’s time to begin by opening the bottom-most brown drawer, and swooping the contents inside your stock.
Transfer the garments to the left facet to disclose a field containing a be aware with a sample inside.
The -+ mentions we should always prepare the liquid bottles in ascending order (decided by the liquid quantity).
There occur to be liquid bottles on high of the secure, this puzzle refers to that.
Simply transfer the bottles based on the talked about order to listen to a click on that’ll open up a hidden compartment within the room.
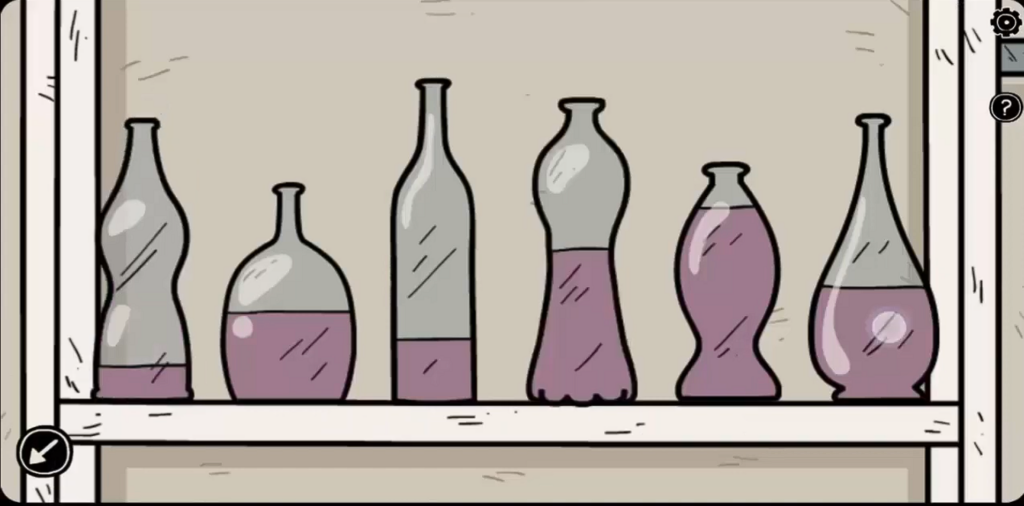
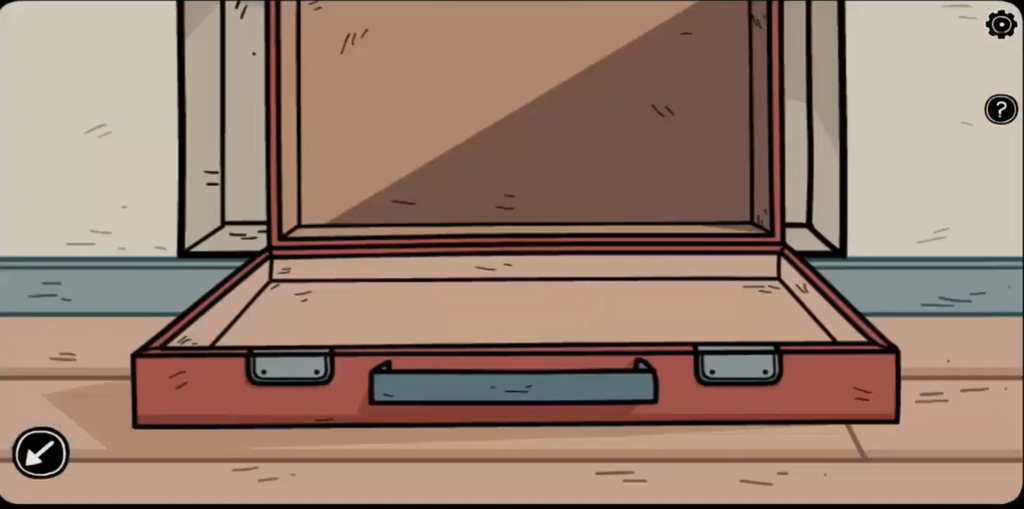
A pink briefcase appears to be mendacity right here, locked. Use the -+ be aware you simply discovered to memorize the image for each bottle.
We organized these bottles so as, proper? use that order, together with the symbols within the chit to unlock the briefcase.
The symbols on the primary 3 bottles (in the identical order) go on the proper lock, and the final three go within the left one.
There’s a wire inside the unlocked briefcase.
Choose it up, and transfer your focus from the briefcase to the vent on the left facet of the room.
Faucet on it to do some inspection and discover a key mendacity inside.
Our palms are too massive to achieve inside, however a wire, then again, is a distinct story.
Use “A bent wire” out of your stock to get the important thing out.
We’re going to be utilizing this “White Key” to unlock the higher drawer below the shelf.
Do some tap-taps to open it, and swoop the flashlight, and inexperienced e-book in your stock.
Let’s begin with the e-book first.

Open it up, and analyze the web page with the pirate image.
The order appears to be matching the lock order on the secure above. Let’s go away it at that for now, and discover the vent first.
Since we acquired the maintain of a flashlight, use it to look deeper, and discover one other sample.
As soon as once more, commit this in your reminiscence, and transfer on.
Coming to the sword, faucet to unsheathe it to search out the identical sample because the one you simply noticed. What may this imply?
The reply lies within the pirate image web page of the e-book.
Up to now, we’ve checked the vent and the sword from the symbols.
Two extra areas remaining, earlier than we will open that pesky lock!
Be happy to dial the sample within the secure based on what you noticed (in the identical order as the images within the e-book). Be sure you flip the dots black accordingly.
Now, we additionally occur to have a pirate poster within the room. Let’s take a look at that!
The pirate appears to be pointing in a course, similar with the compass.
These are the dots we have to change to black.
Since we’ve obtained one other sample, it’s time to go again to the secure and dial these in. As soon as achieved, simply faucet on the secure to open it – or so that you thought.
Head again, and transfer the garments to their unique place.
See these sneakers hanging inside these 4 mounts? Yeah, that’s the ultimate sample – with the presence of the sneakers figuring out the change in coloration.
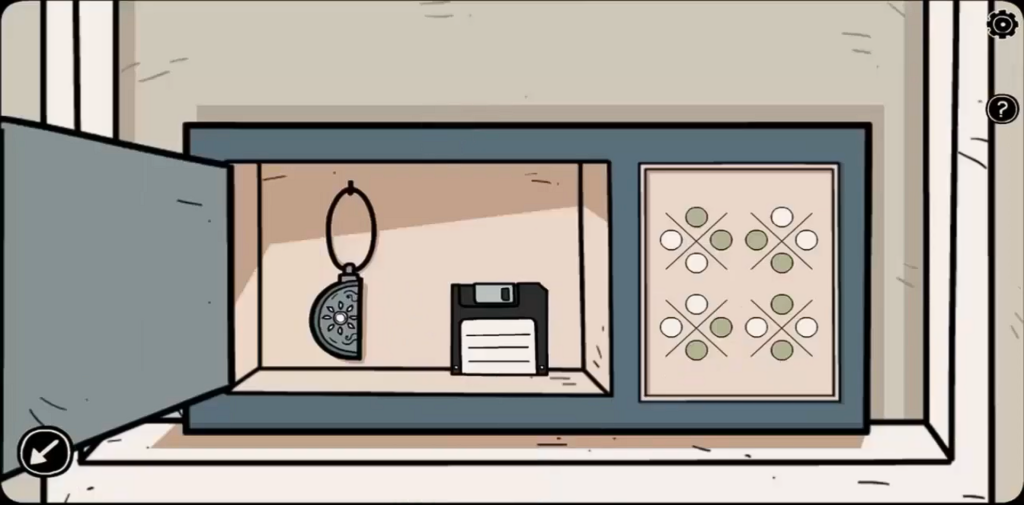
We’re achieved this time (for good). Now, peer contained in the secure to discover a floppy disc(requires a visit again) and a damaged medallion.
Insert this floppy disc into the pc at your workplace, and begin searching the contents.
Throughout the textual content information, you’ll discover the handle of an individual named Anna, that, based on the pictures, appears to be an in depth buddy of the murdered siblings.
Time to go to her home, and examine additional!
Similar to Dan, Anna can be not very adamant about spilling the beans.
Time for a bit persuasion.
Whereas she’s within the window, give the damaged medallion to her.
Recognizing it, she’ll allow you to in like the sooner reluctance was a hoax!
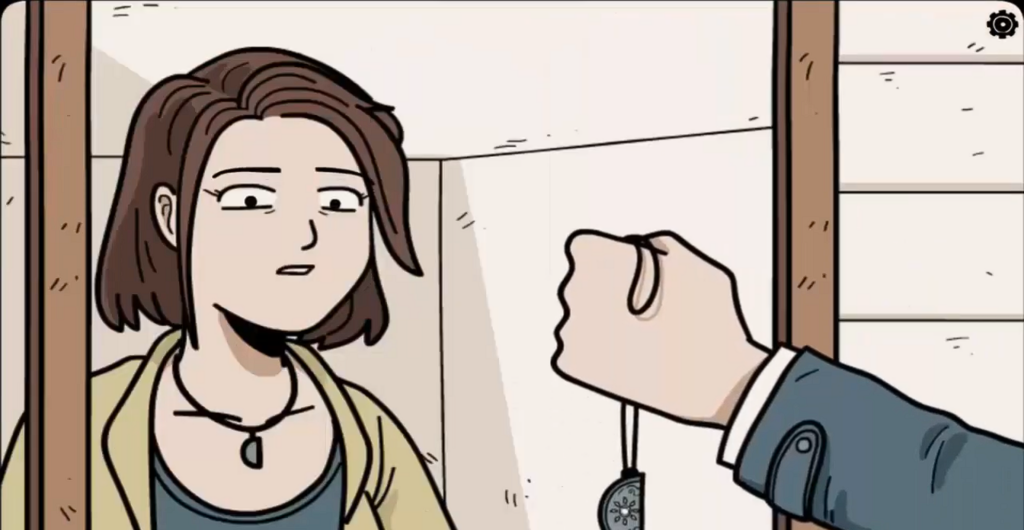
Look in the direction of the purple drink bottle on her proper to search out one other owl.
Now, cycle by the questions to search out the next data:
- The medallion was only a token of friendship between Anna and Mia.
- Anna occurred to fulfill them on the homicide day.
- Mia and Dan gave the impression to be very terrified of one thing on the homicide day.
- Looks as if the siblings opened a tomb that freed one thing very darkish from its shackles.
- Looks as if Anna believes this to be the work of an evil spirit.
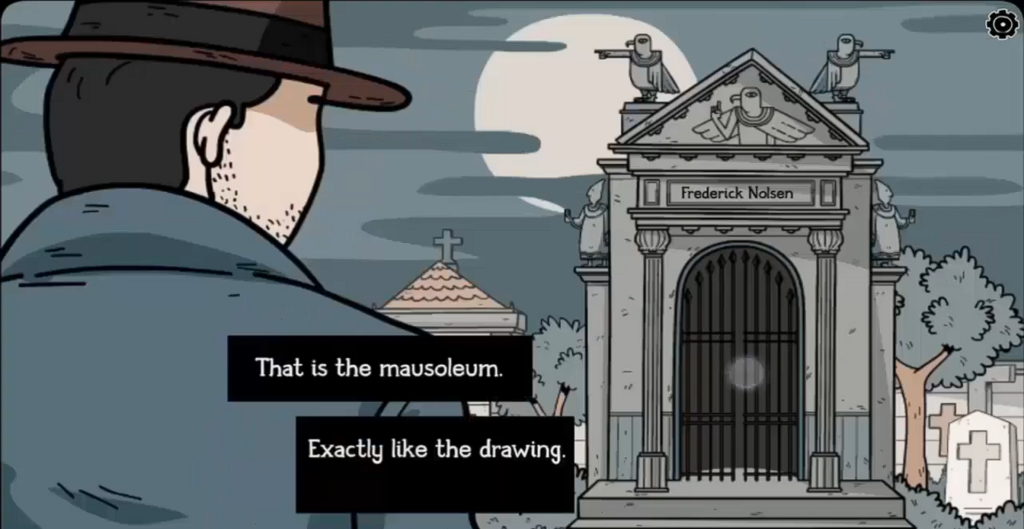
Anna then lends you an image of the tomb they opened. Appears to be like like we’re due for an additional journey.
Pack your belongings (figuratively), and faucet on the map to go to the unlocked location!
The grave appears to belong to “Frederick Nolsen”. Head inside to find extra!
The room is fairly darkish, however we occur to have a lantern on the left facet.
Nonetheless, there’s no method to gentle it up – till you uncover the matches mendacity on the underside shelf on the fitting facet of the room.
Use these on the lantern, after which use “A lit lantern” to position it on high of the coffin.
There should be some clues inside, faucet on the coffin to disclose the contents – Oh.. looks like it’s empty. Irrespective of, let’s memorize a pictorial map of the room.
The shadows of the objects, the portray behind the wall – all signify one thing.
We will match the shadows with the objects within the portray.
For instance, you’ll want to transfer the cage to the picture of the hen within the tree, and vice versa.
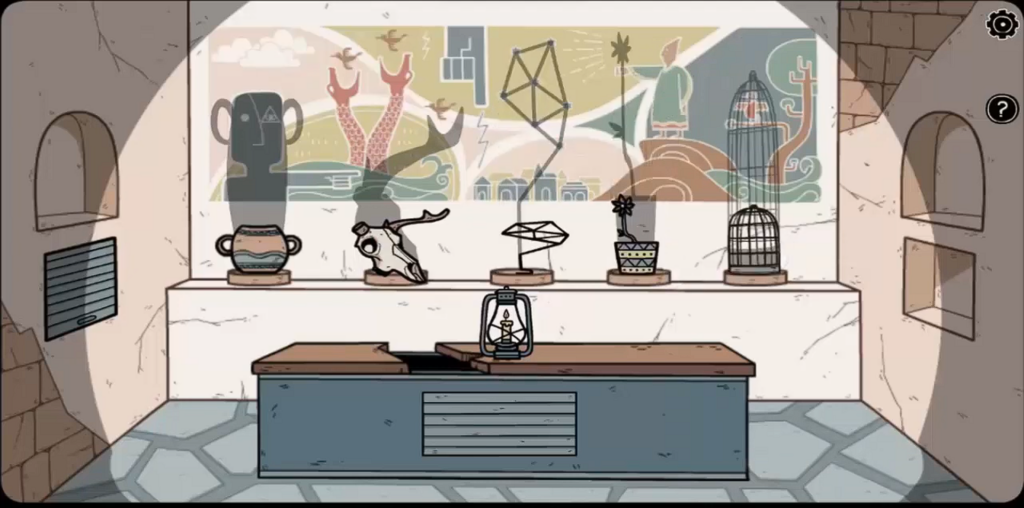
In the long run, the next combos will happen:
- The Pot goes in entrance of the Statue.
- The Cranium goes in entrance of the dinosaur-like creatures
- The wire-like object matches the celebs
- The Wizard will get the flower pot
- The hen will get the cage
When you’re achieved arranging, a compartment will pop up on the left facet, and the coffin can have some type of puzzle within the middle.
Let’s begin with the item within the compartment. Choose the ring up, and go away the puzzle for now.
Time to return to the police station, and piece the brand new data we discovered!
Faucet the map to maneuver again.
Looks as if our detective character has opened up Frederic Nolsen’s file to do some digging.

Looks as if this man was accountable for killing three folks in bizarre rituals.
He was later executed by electrocution in an electrical chair. Nonetheless, he claimed he’ll return to life earlier than hitting the bucket.
The story appears to be a century previous. Creepy…
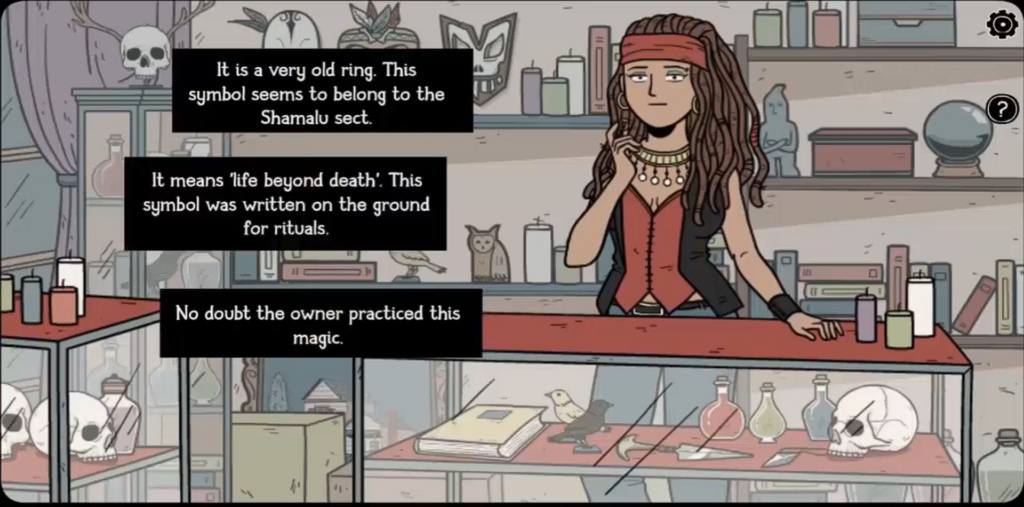
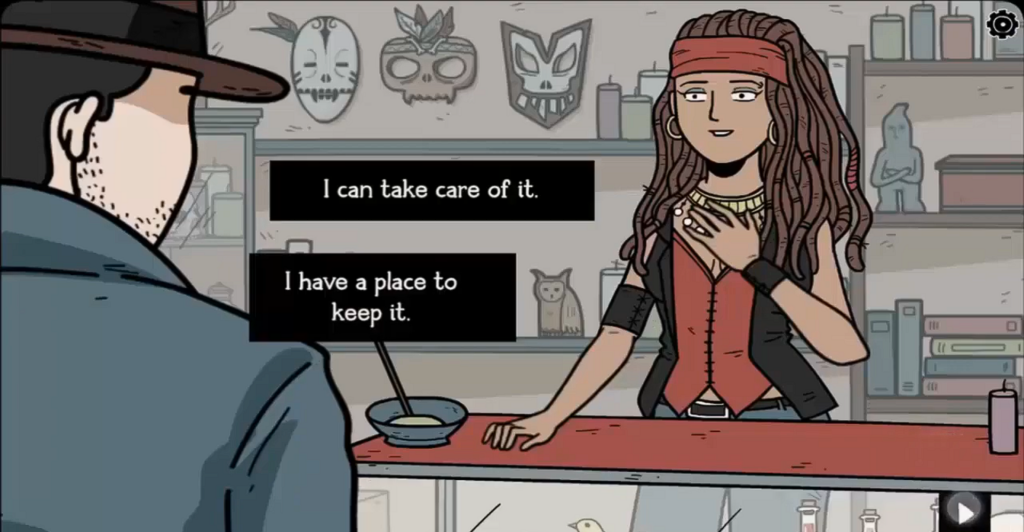
In any case, let’s head to the shop to search out extra data on the ring we simply acquired.
Faucet on the map to go to the brand new location.
Throughout the drive, the detective begins to piece the contents collectively.
All of it makes an excessive amount of sense.

The darkish magic, the sufferer’s causes of being scared, and the century-old tales, all piece collectively. However is that actually it? Let’s discover out extra!
Earlier than speaking to Laura within the retailer, tape a peek on the gadgets behind her to search out one other owl.
Then, simply cycle by the inquiries to have the next data revealed:
- The ring was a possession of the Shamalu sect. The image on it was used for rituals – which means, the proprietor knew Shamalu sect magic.
- It looks like a cemetery guardian (who went loopy) retains drawing this image whereas being locked up within the madhouse.
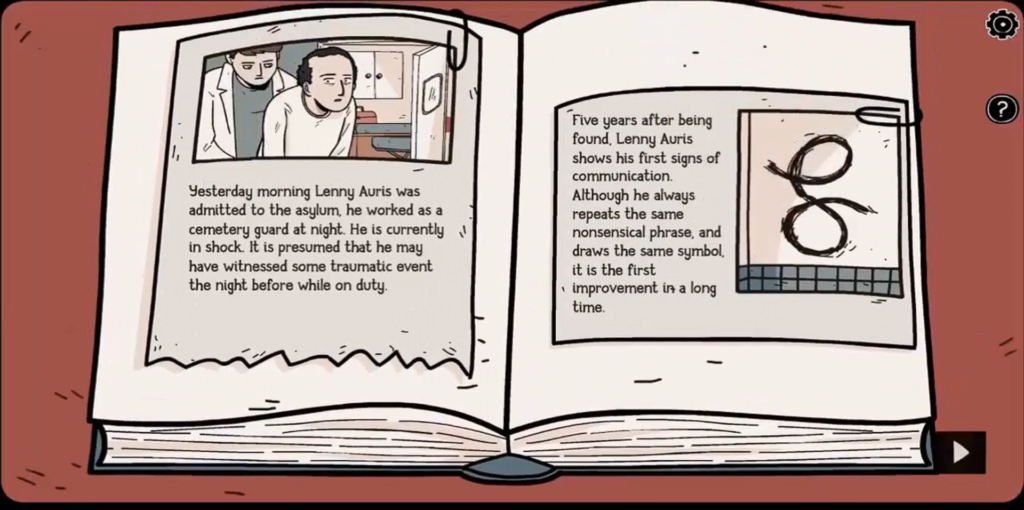
After the questioning, Laura reveals us an article on Lenny (the guardian).
Looks as if he went loopy 5 years in the past, and has been drawing the image, and repeating a single phrase ever-since.
Let’s transfer to the madhouse to speak to this Lenny man and see what’s up.
However earlier than that, full your dialog to disclose extra data in regards to the ritual:
The rituals included the practitioner making 7 sacrifices. Nonetheless, this practitioner has to die after making the primary three sacrifices.
Subsequent, somebody must open up the practitioner’s grave.
Appears fairly on level with our present case.
Subsequent, the practitioner has to make 4 extra sacrifices – which can find yourself granting him/her everlasting life. Contemplating Mia’s and Dan’s loss of life, the practitioner should want two extra sacrifices.
Throughout that point, the practitioner’s spirit can have some management over their physique.
Now, can we in some way undo this? The reply is sure!
So all we have to do is to lock the practitioner’s (Frederick on this case) spirit right into a doll on the final sacrifice. Nonetheless, this doll should be the property of the ritual performer.
Equally, that ring’s image should be drawn upside-down within the ultimate sacrifice.
Looks as if Laura has been an amazing assist in untangling these mysteries.
She additionally palms a Shamalu doll to you in case you wished to cease the ultimate ritual.
All of that is fairly lucky, however it’s time to speak enterprise once more.
Let’s go meet Lenny, and see if we will get any extra clues.
Use the map to go Hospital, the place Lenny resides.
Time to ask the receptionist about Lenny. However earlier than that, faucet the blue e-book on the desk to disclose an owl.
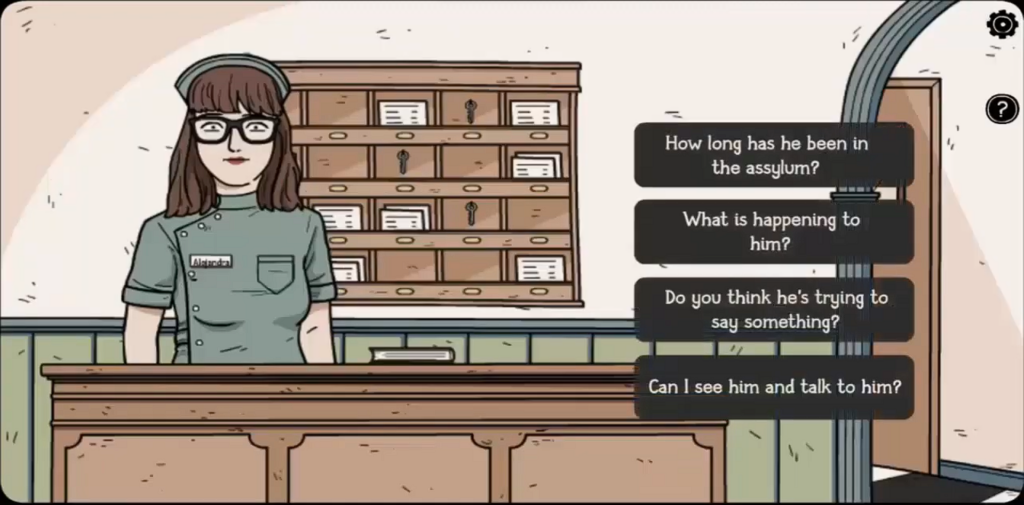
You’ll encounter the next data after speaking to her:
- Lenny has been within the asylum ever since Den and Mia opened the tomb.
- Looks as if Lenny witnessed one thing traumatic. He’s consistently attempting to speak one thing by his drawings, however the hospital employees can’t make sense of it.
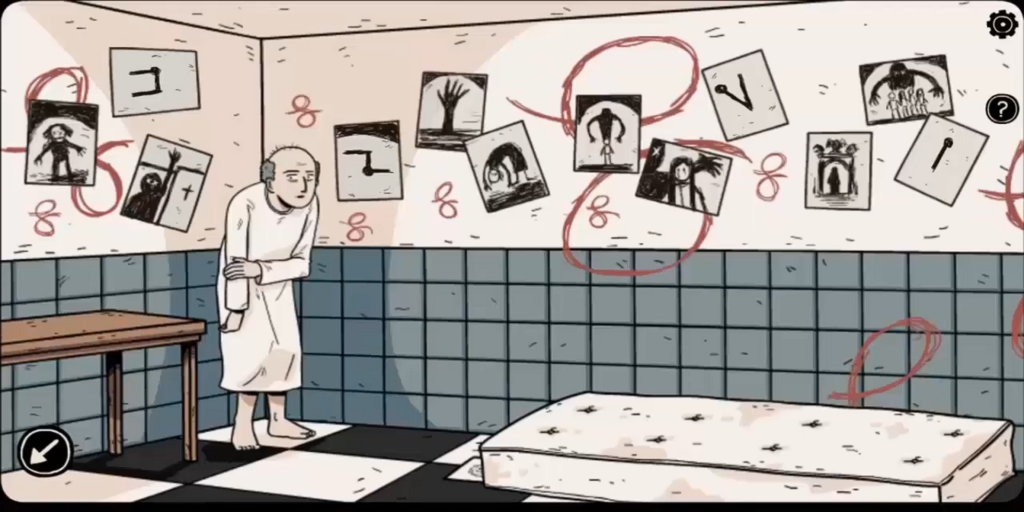
Inside Lenny’s room, faucet on the paper below the mattress to search out one other owl.
Then, let’s analyze all the images unfold on the wall.
It looks like one thing got here out of the tomb, and is stalking 4 folks.
Contemplating Mia, and Dan have already been murdered, the opposite two may solely be Anna and Lian. Doing the maths, the quantity provides up!
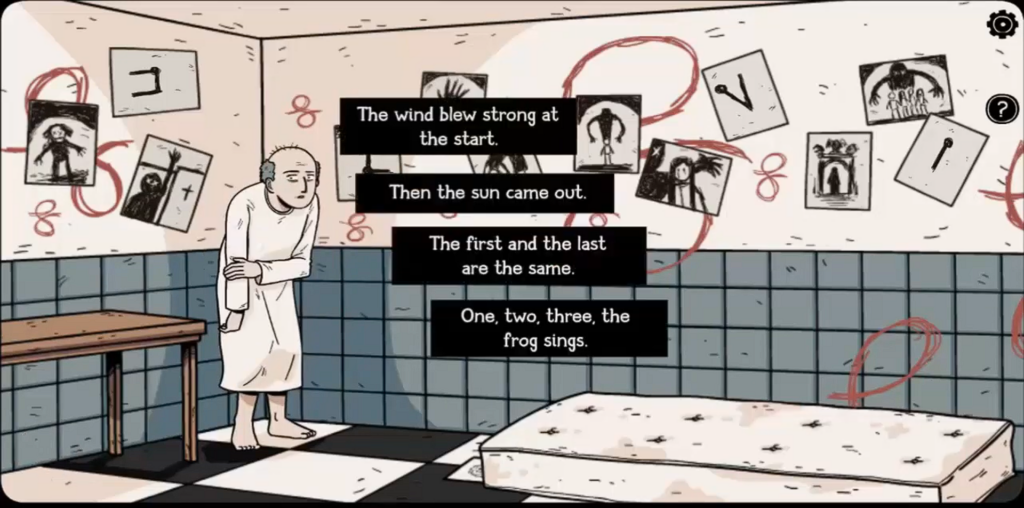
Time to investigate the line-based pictures that seem like a clue to a different puzzle.
Memorize them, after which attempt to converse with Lenny.
Commit no matter he says to reminiscence, and head to the graveyard.
In your manner, you’ll get a name from the police station.
Upon choosing it up, you’ll come to know that Lian and Anna have been taken someplace, and their homes appear to be forcefully breached.
Now, to be able to remedy this thriller as quickly as potential, you’ll want to rush to the tomb to resolve the symbols on the coffin.
Match them based on the sample you noticed in Lenny’s room.
Let’s begin by getting the place of the dots proper.
Merely drag them into place then decipher Lenny’s riddle to be able to receive the second a part of the puzzle.
In accordance with what he instructed you, prepare the tiles below the dots and you need to be good to go!
A secret pathway will present itself when you’re achieved with the riddle, faucet on it to go downstairs, and begin analyzing.
Let’s go away it at that for now, transfer to the second room, and do the identical till you attain the third room.
Attempt to preserve as many of those objects in reminiscence as potential since we’re going to be utilizing them in the end.
With that stated, head contained in the darkish cave within the third toom.
As soon as there, you’ll see 4 pink stone pillars together with small animal statues beneath.
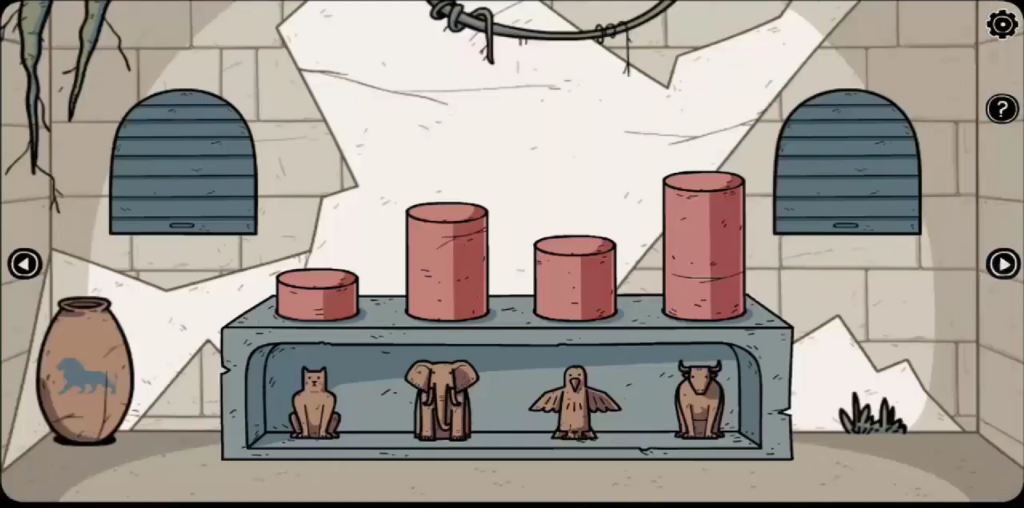
You must transfer these based mostly on their weight.
The lightest animal will go on the smallest pillar, and the heaviest animal will go on the most important one, and vice versa.
Fixing this riddle will unlock the cabinets within the room to disclose a pot on the left and a bottle + lifeless bone on the fitting.
Choose them up as they appear to belong to Frederick.
On the fitting facet, faucet on the pot to be able to launch a bee that may begin making its personal distinctive journey.
Comply with it to the subsequent room to be able to see the place it lands.
In your journey, preserve monitor of the objects the bee lands on, and retailer them in your stock, faucet her each time she does land on one thing to make her proceed her journey.
Lastly, she’s going to land on the tree within the subsequent room to be able to pollinate it.
This tree will immediately sprout flowers and can wither away leaving nothing however a mushroom as an alternative.
Choose it up, and retailer it in your stock.
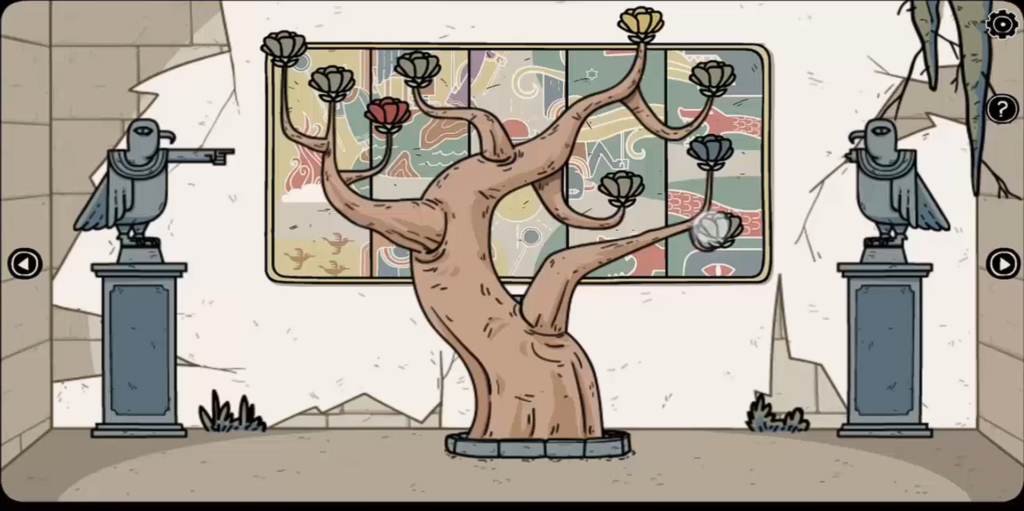
Now, it’s time to finish the image on the wall on the again.
This can be a easy left-right puzzle that simply must be adjusted with fixed trial and error.
As soon as solved, the compartment under will open up revealing the important thing inside.
Sweep it up, and head to the room with the snake jar.
In your proper facet, insert that key within the pink containers, and retailer the Wood flute, Pestle, and Jar in your stock. Bear in mind the room with an precise snake?
Let’s go there and check out the flute on it!
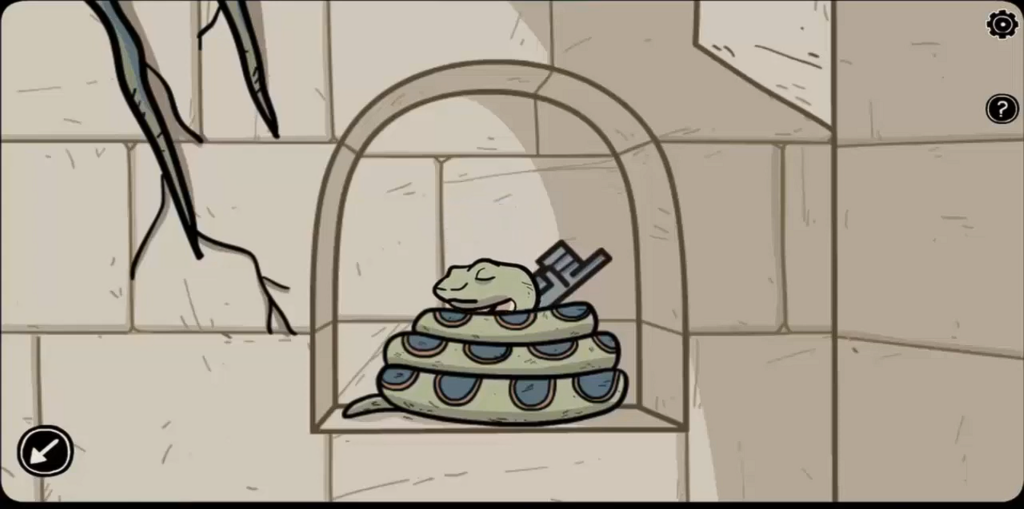
Upon doing so, the snake will fall asleep, leaving the stone statue behind it defenseless. Now, let’s transfer again to the earlier room with the portray we simply reassembled.
One of many statues appears to have an arm lacking, and we’ve got simply the factor for it!
Do some tap-tap to get it fastened – which can reveal some symbols on the portray on the wall.
Commit their order and shapes to reminiscence, and transfer again to the room with the snake.
See that puzzle below the shutter on the left?
Fill the symbols so as based on the image from left to proper, and seize the paper and the jar from inside. Looks as if our stock is stuffed to the brim.
Let’s remedy some riddles to make extra space.
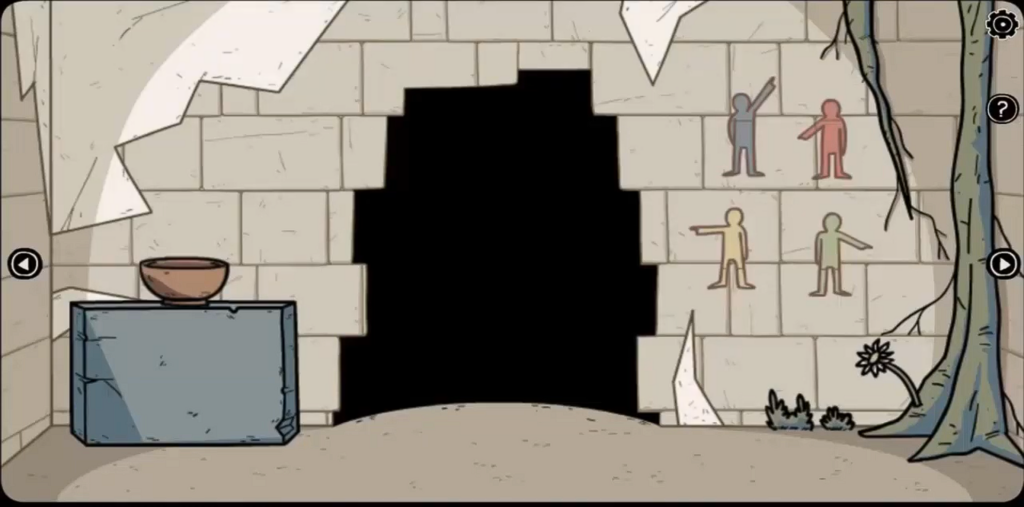
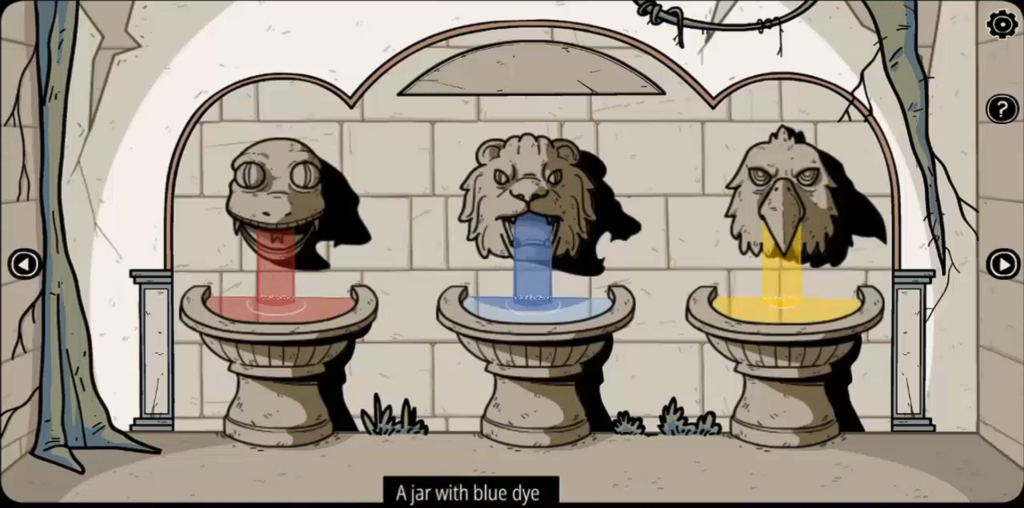
Transfer to the room by the darkish passage the place 4 pictures of individuals have been pointing in a distinct course.
Faucet on the bowl on the left facet, and drop the flowers in one-by-one.
Beginning with the blue flower, faucet on the bowl to make blue dye.
Then, use the jar to retailer it away. Repeat the method with the pink and yellow ones.
Now check out that paper type your stock, and memorize the colours and the shapes on the image.
In the event you have a look at the fitting facet of the room, some work of comparable coloration patterns appear to be pointing someplace.
Memorize these instructions as nicely.
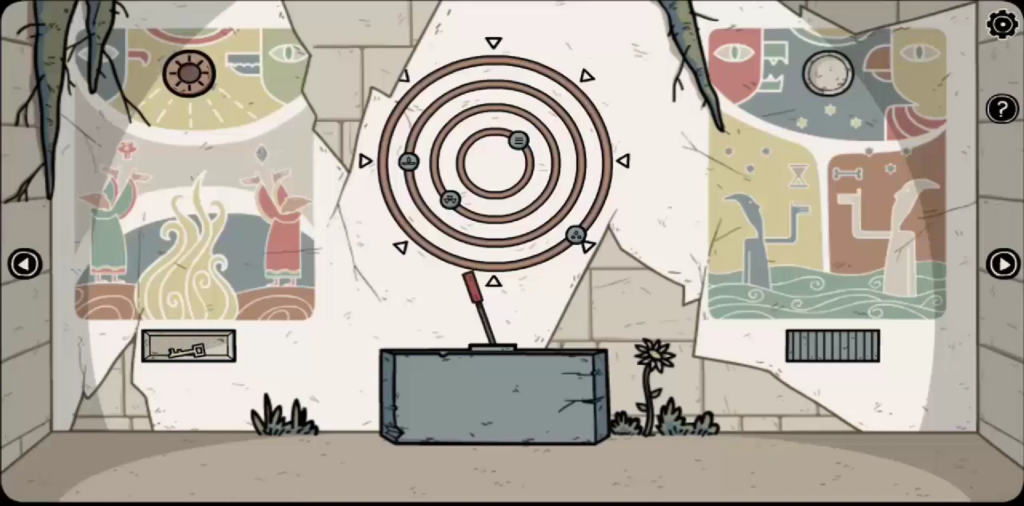
Transfer to the ultimate room at the hours of darkness pathway with the round dials, and patch the symbols with the instructions.
Now, seize the Stone with the drawing of the Solar that may reveal itself from a hidden compartment, and place it on the wall portray the place the solar rays appear to be shining down.
Seize the revealed key under the picture, and pull the lever on the stone.
Memorize the faces of the animals within the follow-up cutscene, and head to the room with the sleeping snake.
Use that key on the blue chest, and retailer the hourglass inside your stock!
Time to go to the room with the snake vase, and memorize its coloration.
Do the identical for the room the place we positioned the animals based on their sizes (there’s a vase on the underside left), after which proceed to the room on the fitting.
There’s one other vase on the underside proper, commit that to reminiscence as nicely.
Since we now know the colours of all of the animals within the cutscene, it’s time to really head to the room, and use our dyes.
Faucet on the dyes, and the water based on the colours and animals you simply noticed. Upon doing this, a compartment will open above, revealing the moon disc.
We have now already slotted the solar disc in one of many rooms earlier than, time to go again there.
Now, slot the moon disc in to disclose the content material contained in the compartment below the picture.
Looks as if we obtained a Crystal of Quartz. Higher retailer that in your stock till a use case pops up.
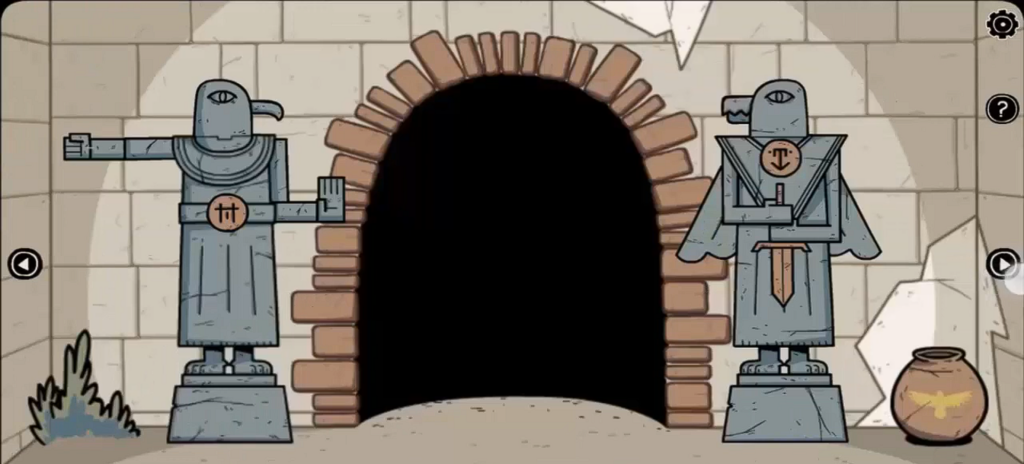
Talking of which, transfer to the room with the 2 stone eagles, and faucet the oddly welcoming entrance they appear to be guarding.
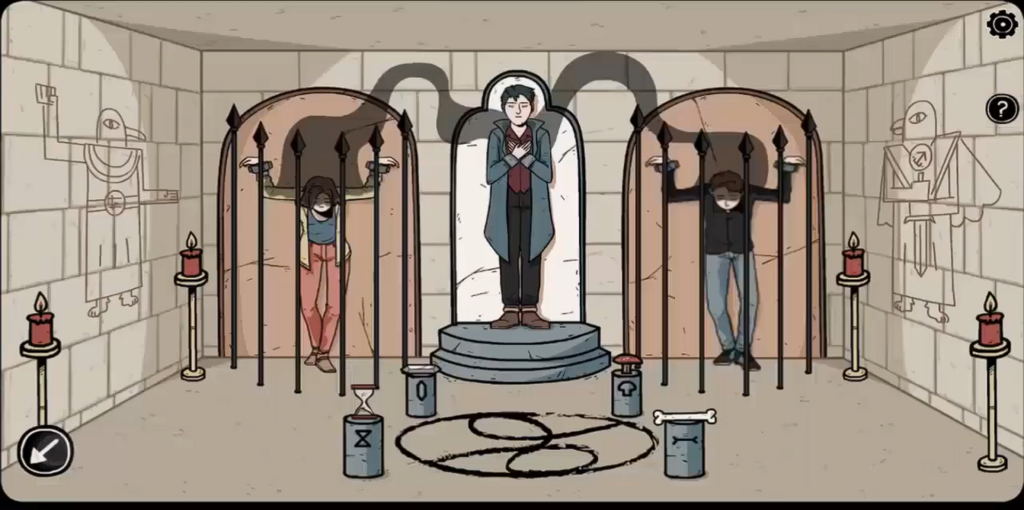
Within the follow-up cutscene, we are going to see Lian and Anna being chained up with Frederick standing in between.
The ritual appears to be in full swing, and it’s as much as you to interrupt it.
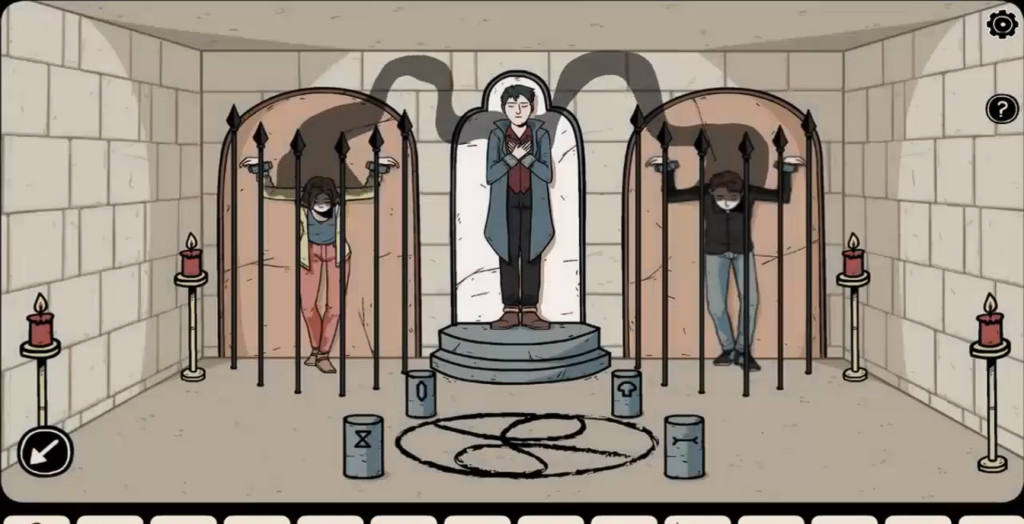
Let’s begin by reversing the image on the ground. You could have that piece of coal from the siblings’ home. Then, it’s time to do one thing in regards to the 4 stone pillars surrounding that image.
There’s a drawing on every of them, and we simply occur to have matching gadgets.
Place the gadgets matching the shapes on the pillars, and let the eagle warriors reveal themselves on the left and proper partitions. However wait, there are some minor variations!
Commit these to reminiscence, and head to the room behind to make modifications.
The unique stone warriors ought to match the depictions within the ritual room.
As soon as achieved, the sport will present the Dangerous ending.
Dangerous Ending
This ending will make each (now freed) characters run towards the detective to flee the tomb.
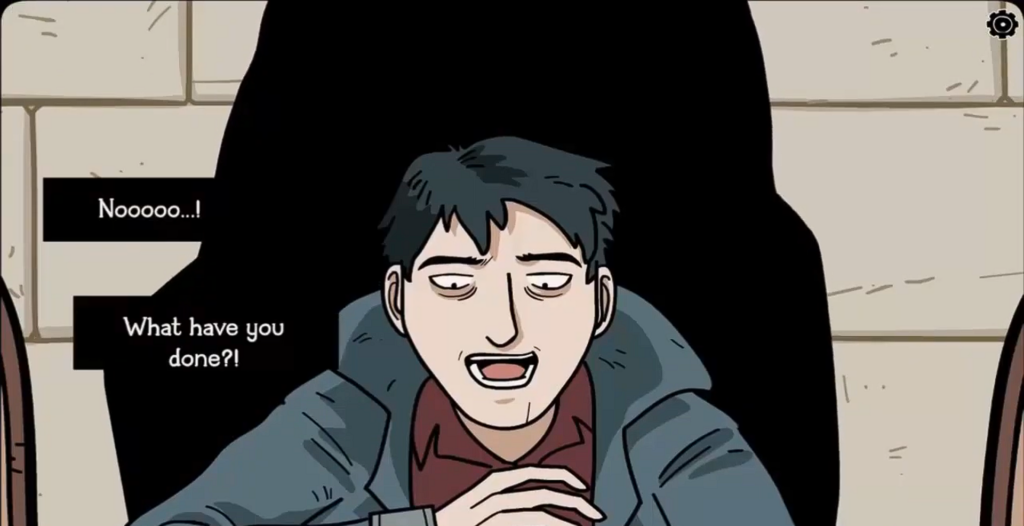
However now with Frederick Nolsen unsleeping, you’ll need to make split-second choices, or you’ll be murdered together with the opposite two.

If that occurs, we are going to later see an article with the headline of you, together with Lian and Anna being murdered.
Good Ending
With the intention to guarantee such a factor doesn’t occur, you’ll want to choose the Doll for rituals out of your stock and use the ring to mix them each proper after fixing the statue.
Don’t head in instantly!
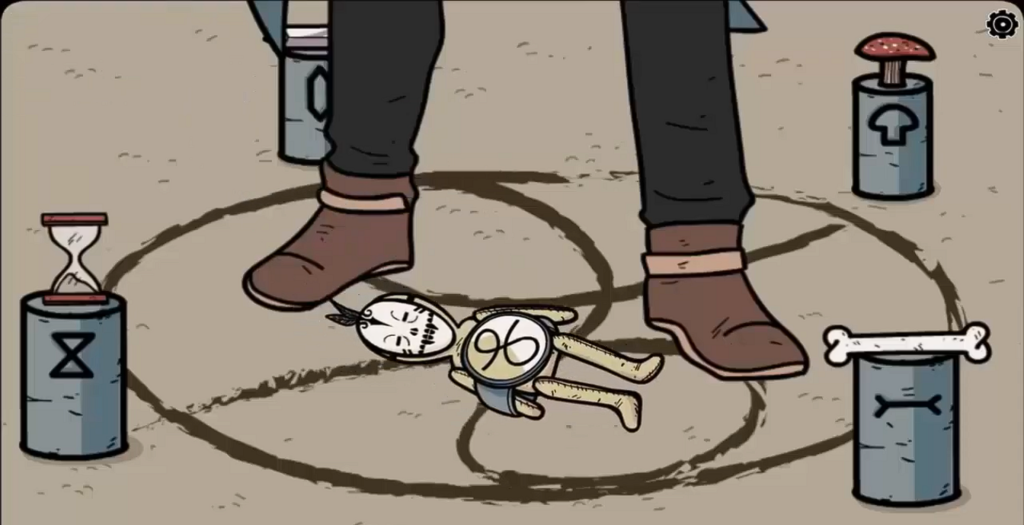
As soon as mixed, the identical cutscene will ensue, proper to the purpose the place you’re about to be murdered.
You must faucet on the mixed doll in your stock, after which faucet on Frederick, to throw it on him.
It will trigger the now-terrified Frederick to be entrapped within the doll perpetually.
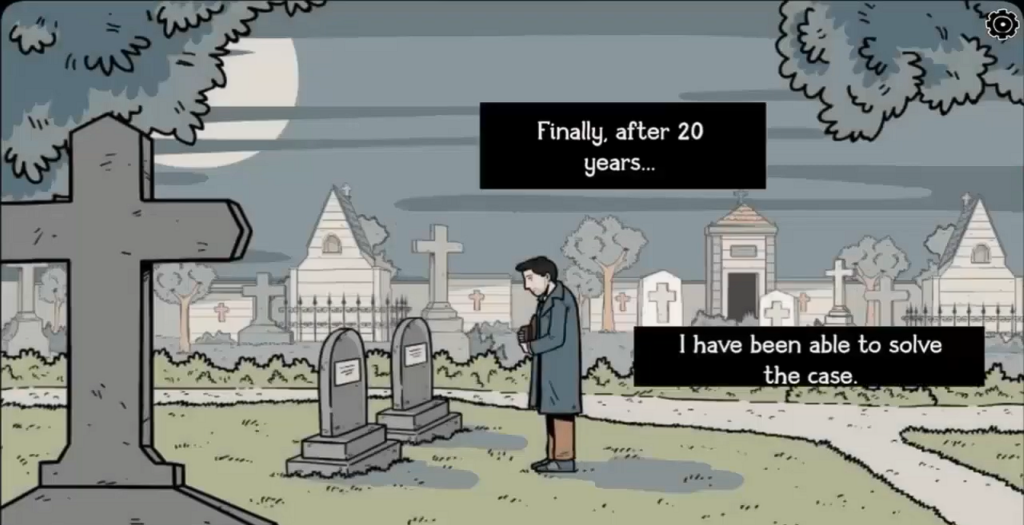
The follow-up cutscene will present Detective Larsen visiting the graves of Dan and Mia to pay them a ultimate go to as a becoming conclusion.
Nonetheless, we nonetheless have the doll, so it appears we should make a go to again to the place we acquired it from.
Fortunately, Laura appears to be very reliable in terms of guarding and storing dolls with evil spirits, so let’s go away the headache to her.
Time to resolve one other puzzle! Looks as if the field laura is attempting to retailer the doll in requires some puzzle-solving.
Hold tapping on the shapes by wanting on the eyes that pop up at their facet.
You mainly must create a route between one eye and the opposite.
As soon as Laura shops the doll inside, she transforms right into a witch. Dangerous information alert! It appears we simply gave the soul of one of many worst criminals in historical past to a witch!
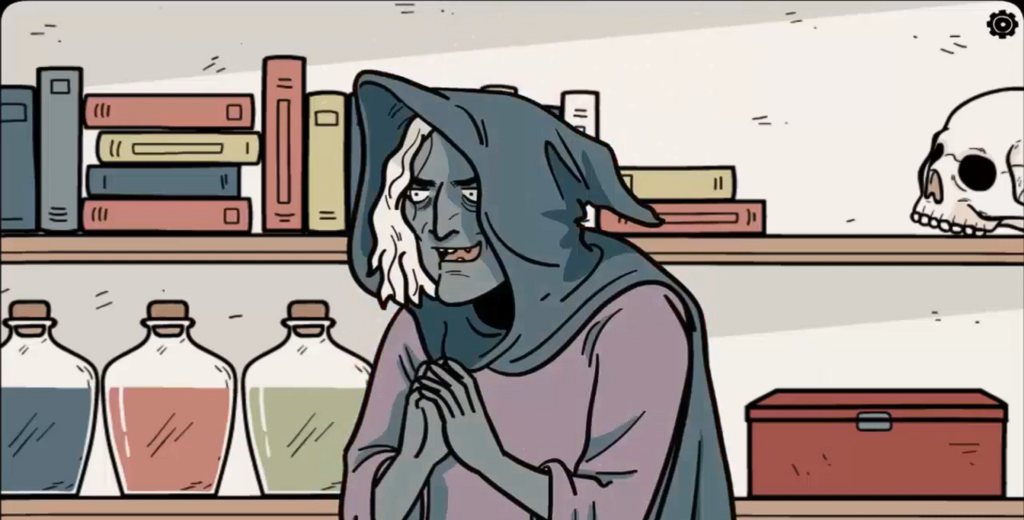
Properly… not our headache. At the least for this sport!
Conclusion
All in all, the sport turned fairly gut-clenching on the finish, and one improper transfer would’ve been the distinction between you succeeding and failing.
Hopefully, you loved studying the Ghost Case Walkthrough.
Keep tuned for extra informative articles.


